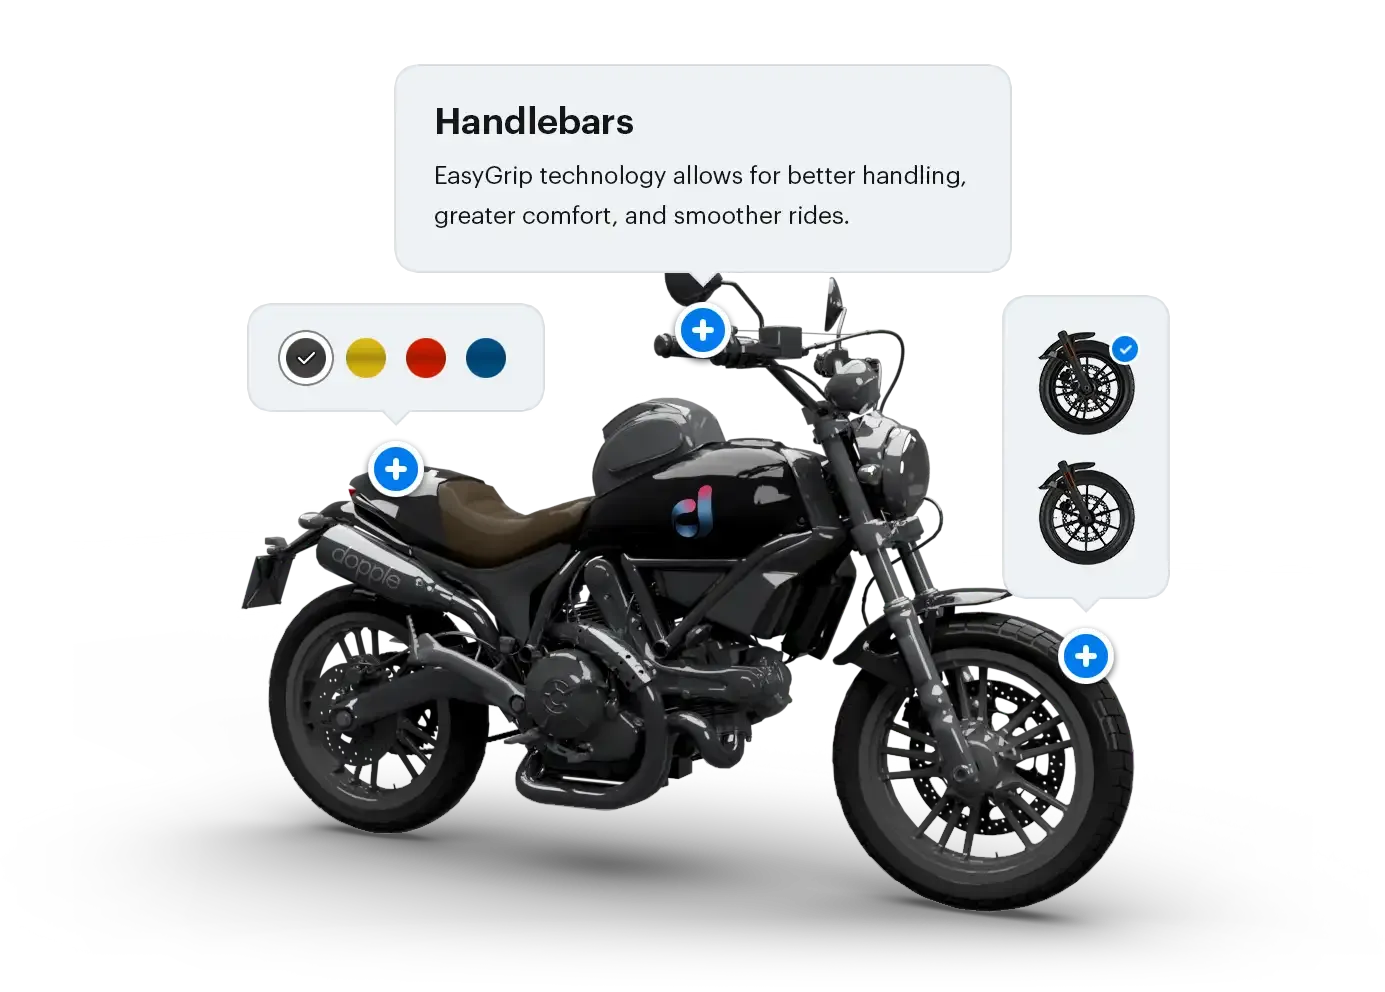
Hotspots
Hotspots provide a way to show annotations or “points of interest” on top of a 3D product, which follow an [X,Y,Z] coordinate in the 3D scene and can be fully controlled and customized in your page’s HTML.
These hotspots are useful for showing additional information about a product, and can even contain interactive elements such as color swatches and buttons to configure that part of the product.

Accessing a Product’s Hotspots
Section titled “Accessing a Product’s Hotspots”Hotspots can be accessed through the matrix.hotspots property on your dopple instance.
const dopple = new DoppleXR({ /* ... */ });
const hotspots = dopple.matrix.hotspots;
Each hotspot has a unique ID, which is used as a key in the matrix.hotspots object.
// Hotspot IDs, like "my-hotspot-1", are created using the platform's glTF editorconst hotspot1 = dopple.matrix.hotspots["my-hotspot-1"];Creating a Hotspot Element
Section titled “Creating a Hotspot Element”While the hotspot itself exists in the 3D scene as a point in space, the content that gets displayed over it does not. Instead, each hotspot can be given an assigned an HTML element elsewhere in your DOM that will have its position updated to follow the hostpost automatically.
<div id="dopple-container"></div>
<div id="my-hotspot">  I am a hotspot!</div>
const dopple = new DoppleXR({ container: document.getElementById("dopple-container"), owner: "my-org", workspace: "my-workpsace", projectName: "My Project", productVersion: "1", selection: {}});
await dopple.load();
const hotspotElement = document.getElementById("my-hotspot");dopple.matrix.hotspots["hotspot-1"].element = hotspotElement;
await dopple.updateSelection();When an element is assigned to a hotspot, it is effectively removed from that part of the DOM and reinserted inside the Dopple container element on top of the <canvas>. If your page’s CSS or scripts depend on the hotspot element existing in its original place in the DOM, you may need to update them accordingly.
Multiple Hotspots
Section titled “Multiple Hotspots”The same pattern above can be extended for products that have multiple hotspots. For example, if a product has three hotspots — foo, bar, and baz — you can either set each element individually or assign them all in a loop.
<div id="dopple-container"></div>
<div data-hotspot-id="foo">Content for hotspot "foo"</div><div data-hotspot-id="bar">Content for hotspot "bar"</div><div data-hotspot-id="baz">Content for hotspot "baz"</div>console.log(dopple.matrix.hotspots); // { "foo": ..., "bar": ..., "baz": ... }
// You can assign each hotspot element individuallyconst hotspotFoo = document.querySelector("[data-hotspot-id='foo']");const hotspotBar = document.querySelector("[data-hotspot-id='bar']");const hotspotBaz = document.querySelector("[data-hotspot-id='baz']");
dopple.matrix.hotspots["foo"].element = hotspotFoo;dopple.matrix.hotspots["bar"].element = hotspotBar;dopple.matrix.hotspots["baz"].element = hotspotBaz;
// Or loop through and assign each element automaticallyconst hotspotElements = document.querySelectorAll("[data-hotspot-id]");
hotspotElements.forEach((el) => { const hotspotId = el.dataset.hotspotId; dopple.matrix.hotspots[hotspotId].element = el;});
// Call updateSelection() after assigning any hotspot elements to activate themawait dopple.updateSelection();Customizing Hotspot Content
Section titled “Customizing Hotspot Content”Because hotspot elements are HTML elements that exist elsewhere on your page, you are free to add any custom HTML content to them as you like. Simple hotspots may contain just static text, but you can also include dynamic text from your CMS, buttons, links, configuration options, images, videos, and any other content.
<div id="dopple-container"></div>
<div id="hotspot-1">  <h2>Hotspot #1</h2>  <p>Content for hotspot #1.</p>  <button>Click me!</button></div>
<div id="hotspot-2"> <h2>Hotspot #2</h2> <video autoplay controls> <source src="video.webm" type="video/webm"> <source src="video.mp4" type="video/mp4"> </video></div>Live Demo
Section titled “Live Demo”Full Code Example
Section titled “Full Code Example”<html> <head> <script type="module"> import { DoppleXR } from "https://builds.dopple.io/packages/dopple-sdk@latest/dopple-sdk.js";
// Initialize Dopple const dopple = new DoppleXR({ container: document.getElementById("dopple-container"), owner: "my-org", workspace: "my-workspace", projectName: "luggage-example", productVersion: "1", selection: {} });
await dopple.load(); dopple.run();
// Assign each hotspot to its corresponding element in the DOM const hotspotElements = document.querySelectorAll("[data-hotspot]"); hotspotElements.forEach((el) => { const hotspotId = el.dataset.hotspotId; dopple.matrix.hotspots[hotspotId].element = el; });
// Activate the newly added hotspot elements await dopple.updateSelection(); </script> </head> <body> <!-- Hotspot elements will be moved into the Dopple container once active --> <div id="dopple-container"></div>
<!-- Hotspot elements, with HTML content for each one --> <div data-hotspot="hotspot-body">Luggage Body</div> <div data-hotspot="hotspot-toiletry-bag">Toiletry Bag</div> </body></html>