BigCommerce Integration
BigCommerce provides multiple ways for developers to build and customize ecommerce storefronts. The two officially supported storefront frameworks are Stencil and Catalyst, each catering to different developer preferences and use cases. BigCommerce also supports building custom headless storefronts using any tech stack of your choice.
While the core Dopple integration remains the same across all storefront types, certain implementation details may vary depending on the approach — whether you’re using Stencil, Catalyst, or a custom headless setup.
For more information, refer to the BigCommerce Storefront Overview.
Adding a Product in BigCommerce
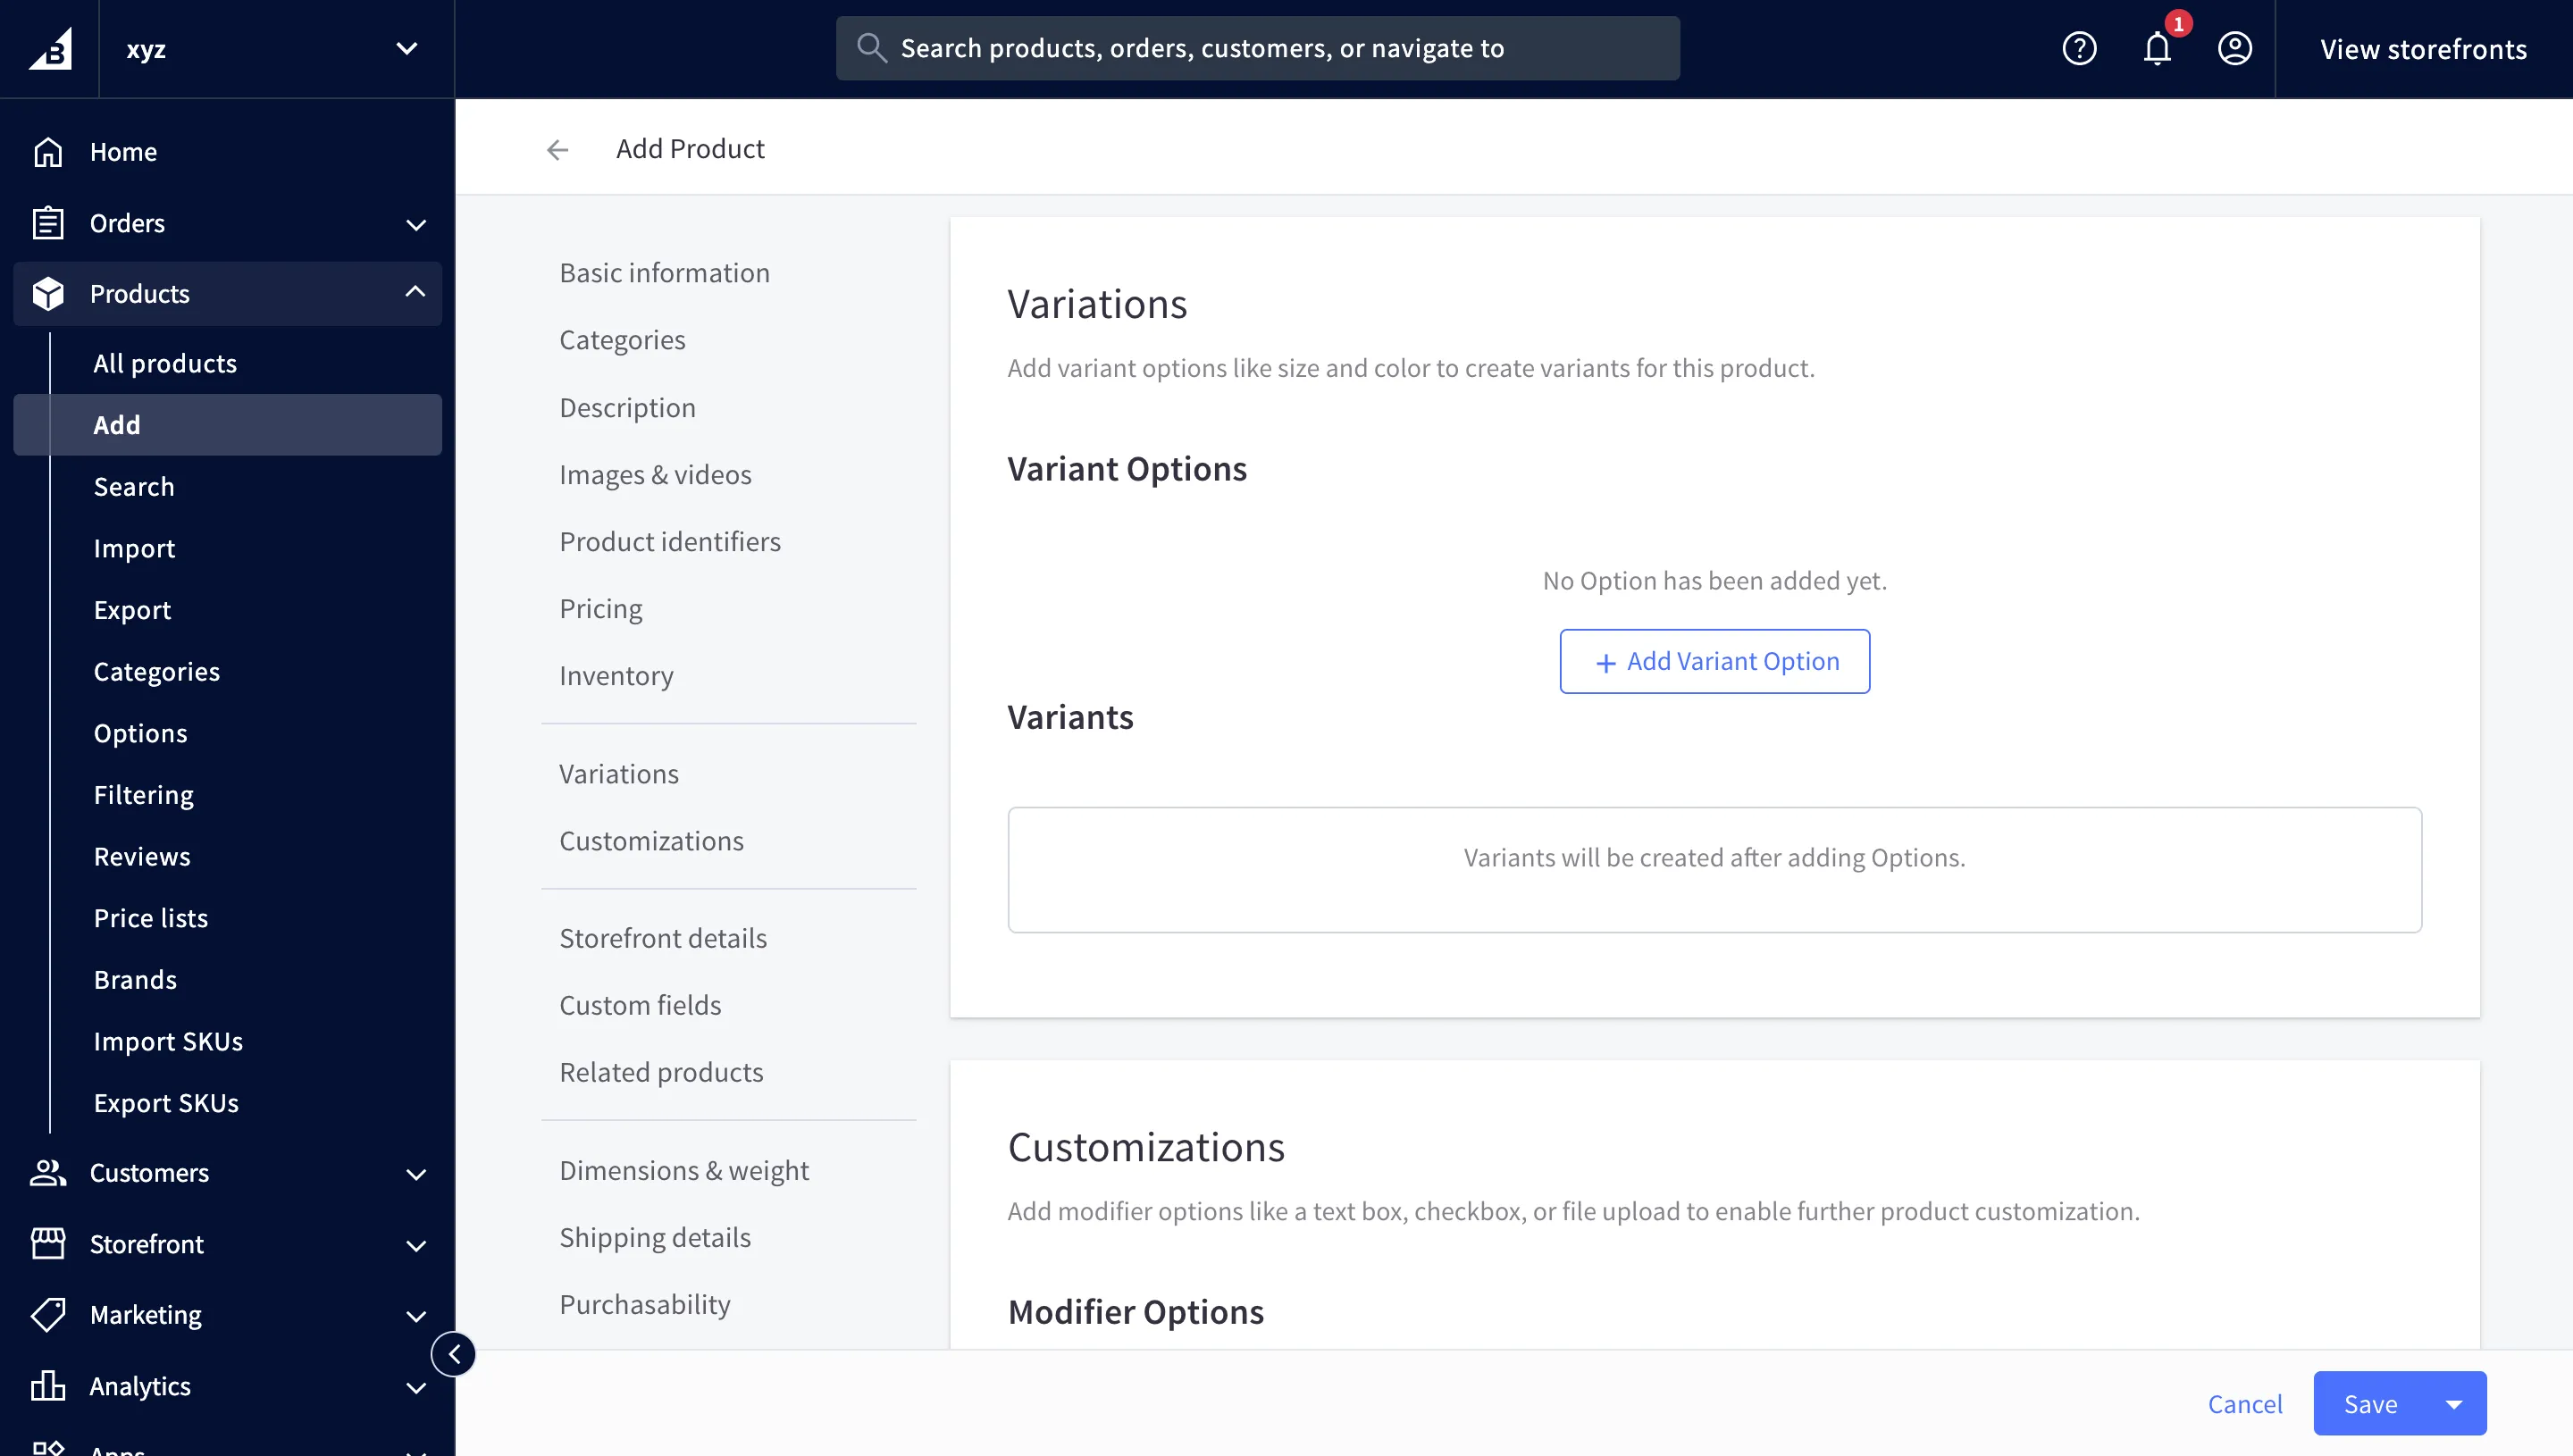
Section titled “Adding a Product in BigCommerce”Before adding Dopple to your storefront, you’ll need to create a product in your BigCommerce store along with any variants.
-
Go to Products in your BigCommerce admin dashboard.
-
Click Add to open the product form, and fill in the required product details.
-
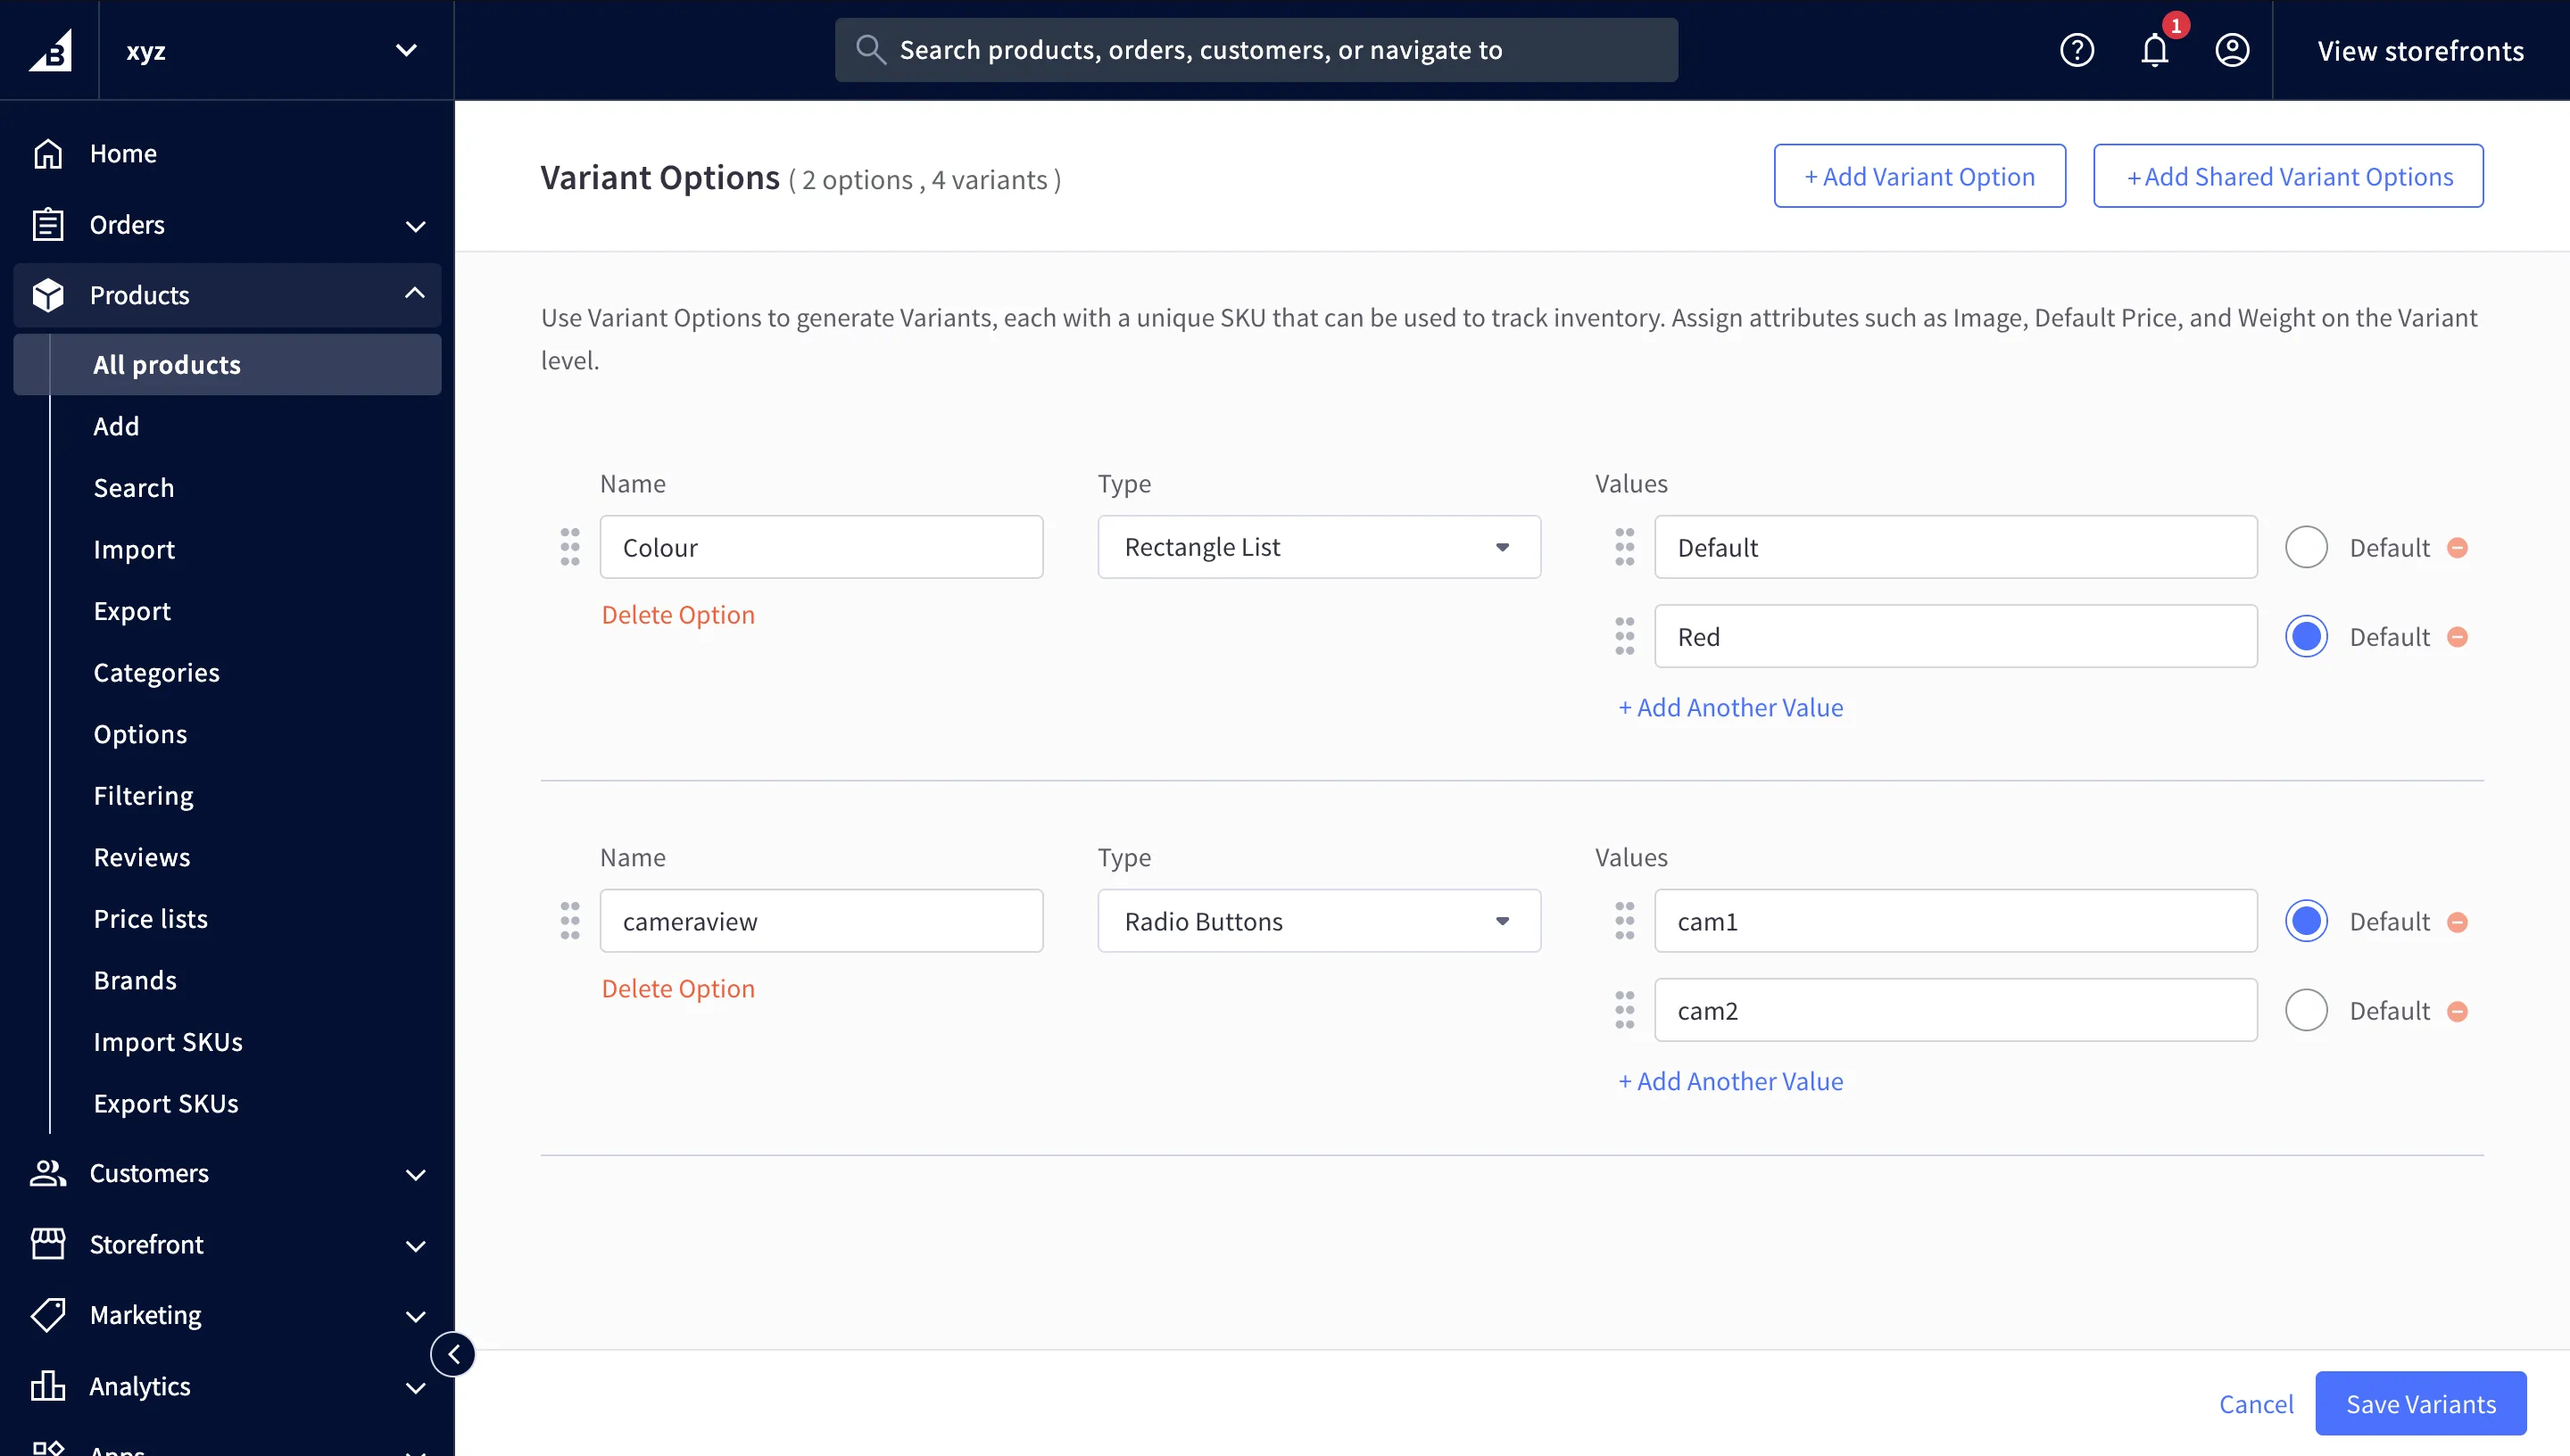
Under the Variations section, click Add Variant Option.
-
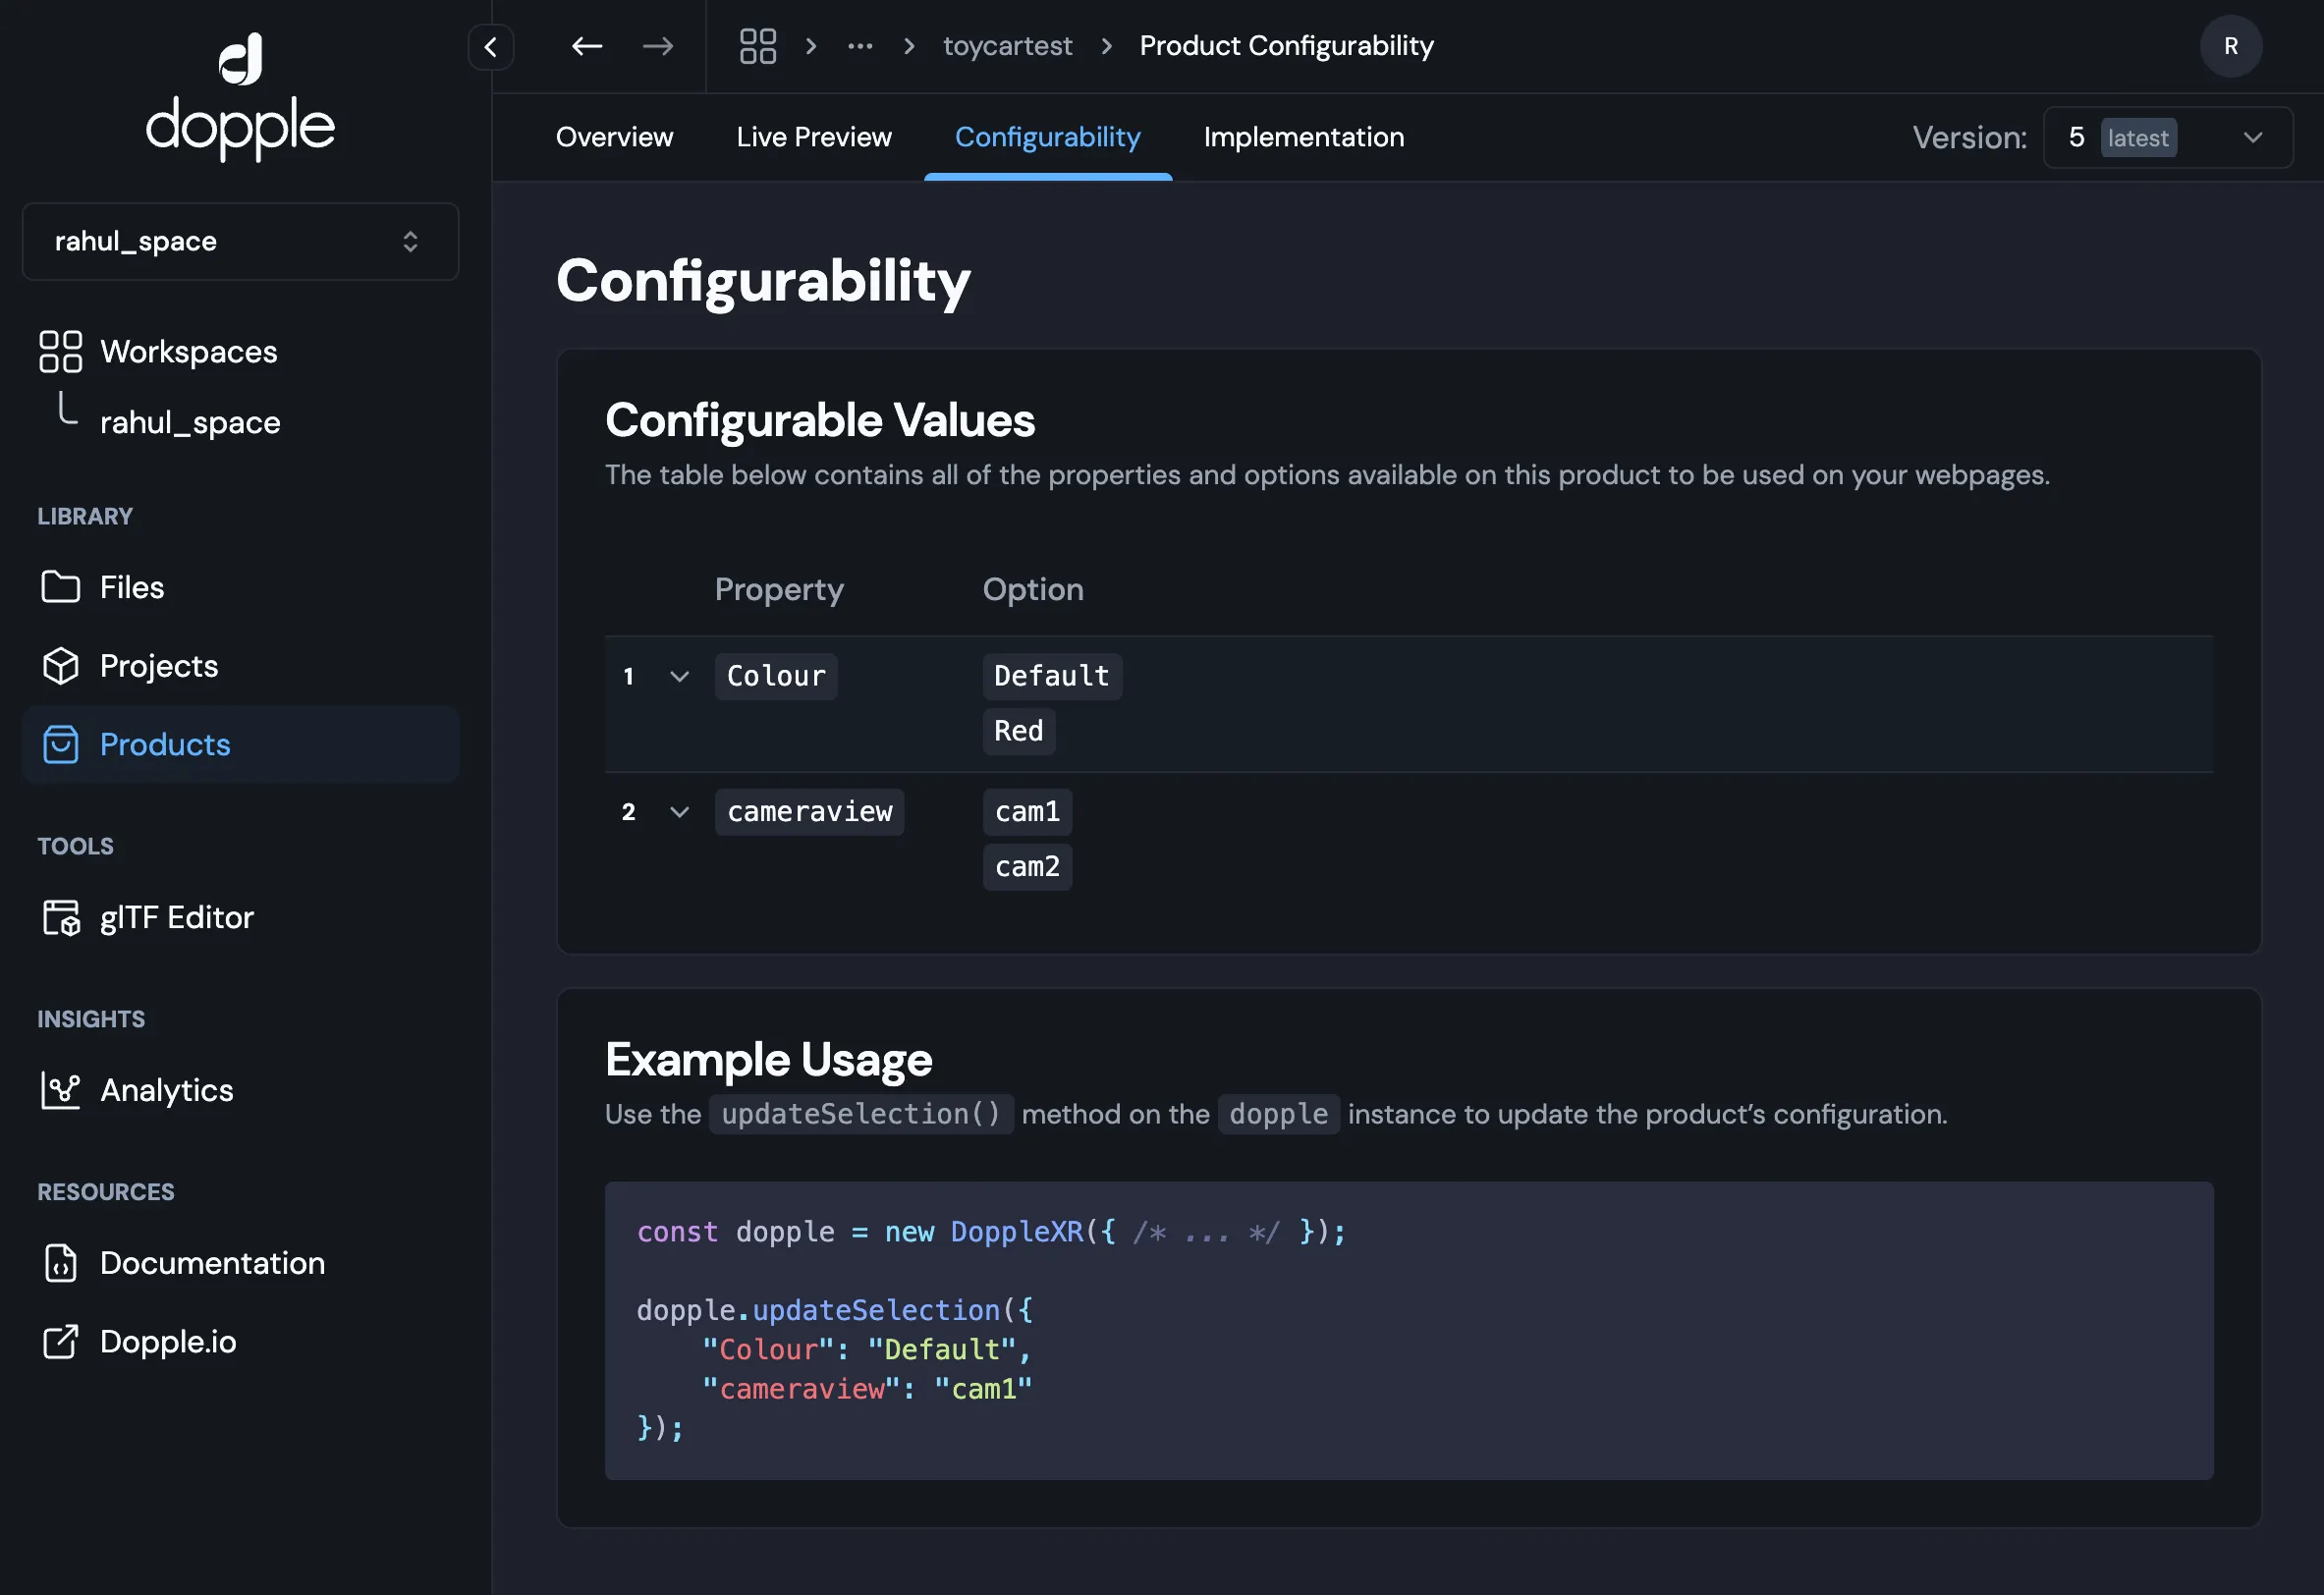
Provide name, type, and values as needed, and ensure the names and values match those defined in your Dopple product configuration.
Adding Dopple Product via Custom Fields
Section titled “Adding Dopple Product via Custom Fields”In order to load a 3D product from Dopple, you will need to specify the owner and workspace that the product falls under, the projectName that the product belongs to, and the productVersion of the product itself. Here, we’ll create custom fields to enter these for each product.
-
Scroll to the Custom Fields section and click Add Custom Field.
-
Add the following field names, and populate them with the corresponding values for your Dopple product.
dopple_ownerdopple_workspacedopple_projectNamedopple_productVersion
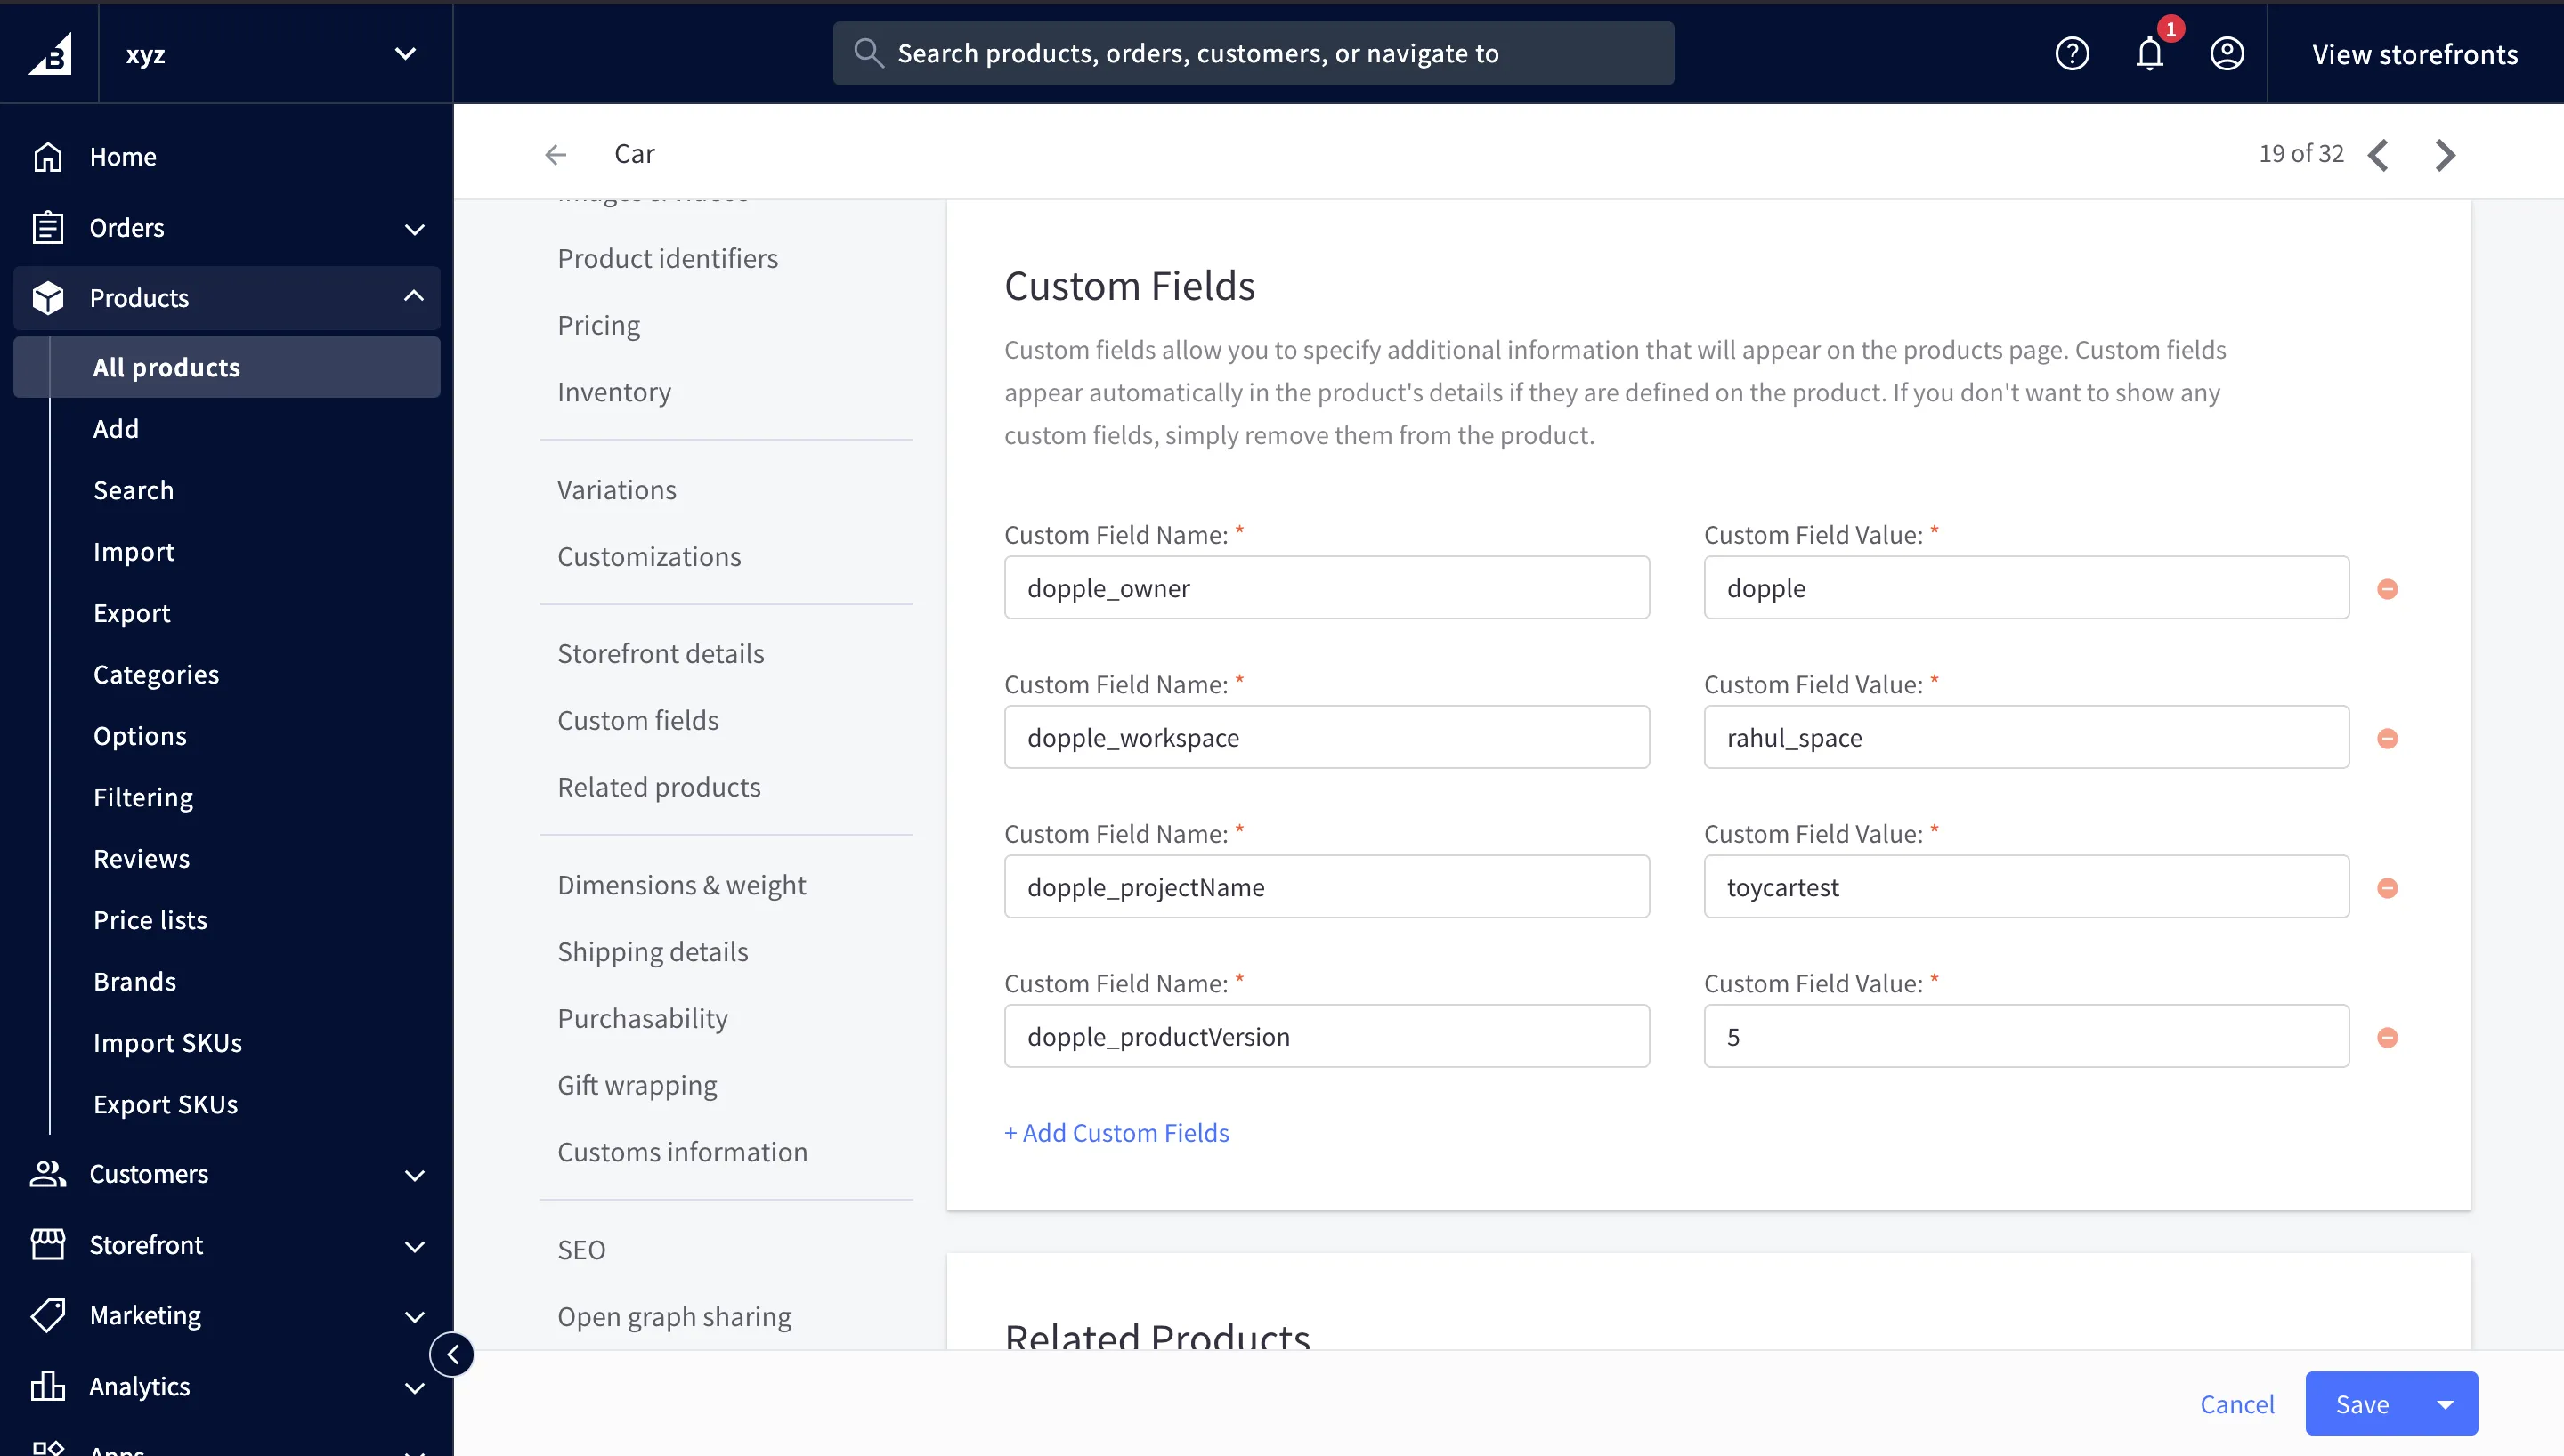
These Dopple product-related fields will be used later by your scripts to initialize and load your 3D product.
Installing and Setting Up Stencil CLI
Section titled “Installing and Setting Up Stencil CLI”For full instructions, refer to the Stencil CLI Installation Guide.
Requirements:
- Python 3+
- Node.js v20+ (Stencil-compatible)
-
Install Node Version Manager (NVM). Click here for more info and latest NVM versions.
curl -o- https://raw.githubusercontent.com/nvm-sh/nvm/v0.40.2/install.sh | bash -
Install and use the correct Node version (you may replace
20.16.0with the desired version).nvm install 20.16.0nvm use 20.16.0 -
Install the Stencil CLI.
npm install -g @bigcommerce/stencil-cli -
Download and initialize the theme.
git clone https://github.com/bigcommerce/cornerstone.gitcd cornerstonenpm install -
Create a store token.
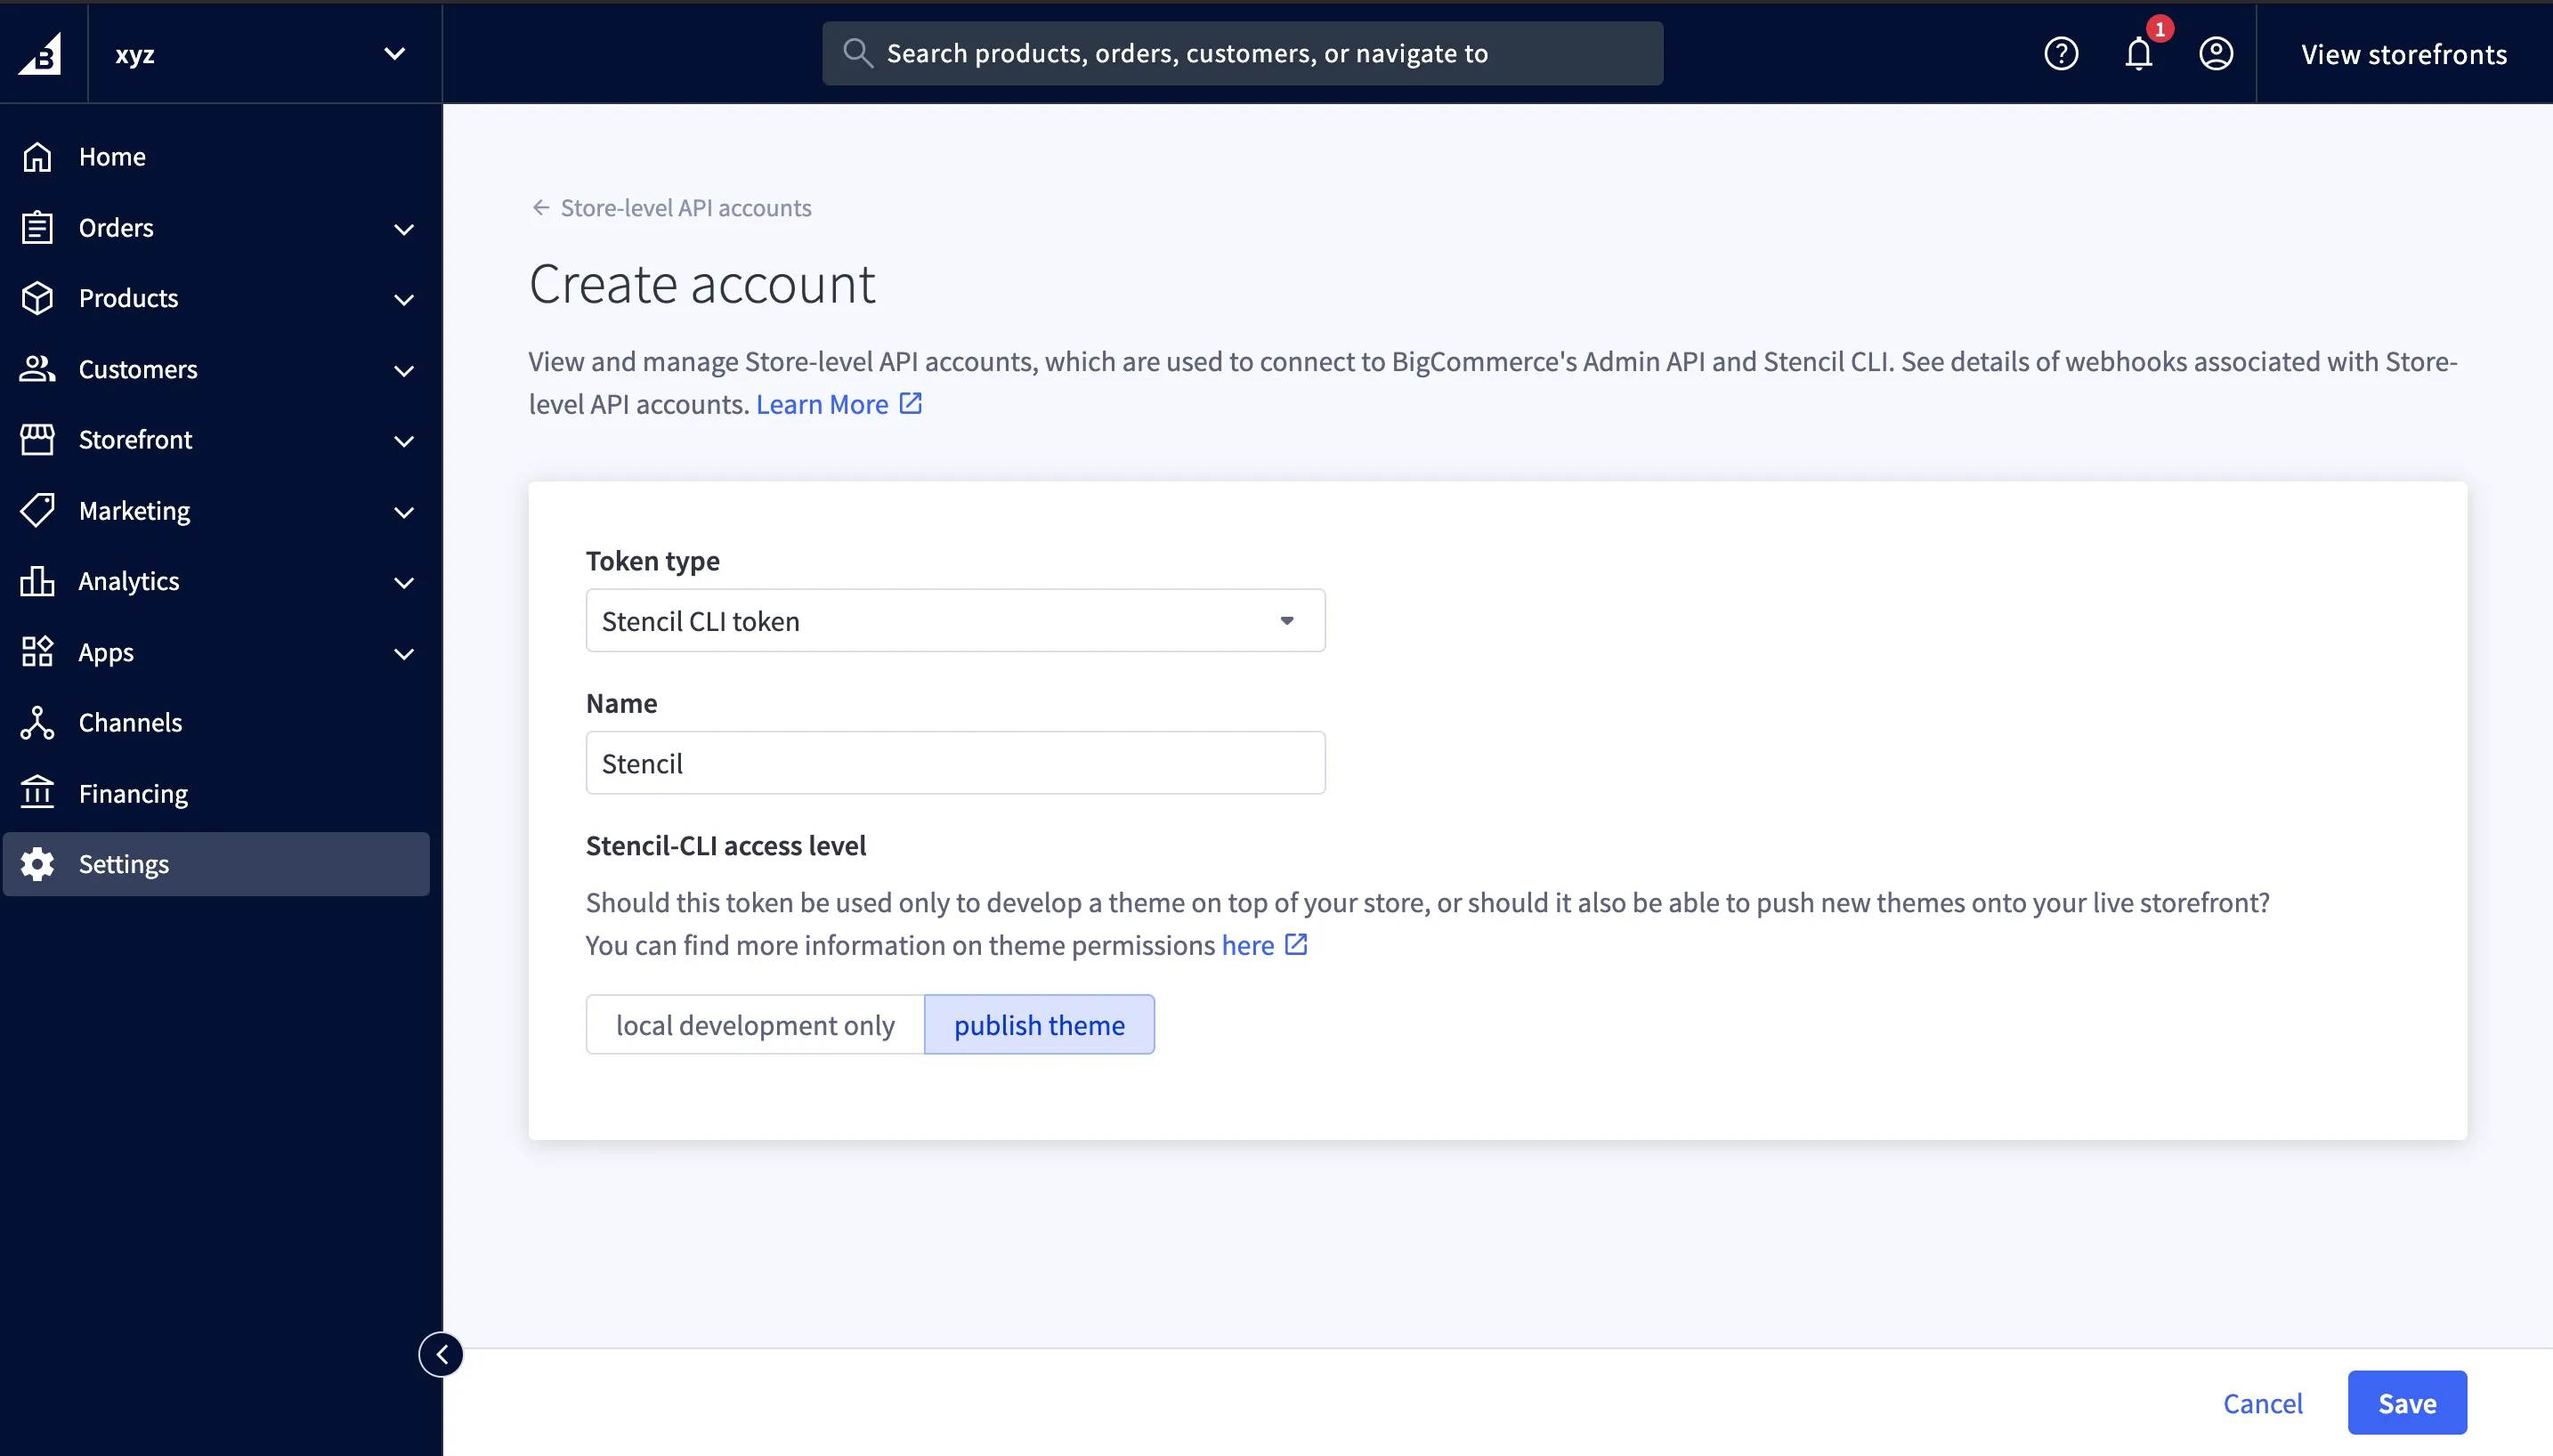
- Go to Settings > Store-level API Accounts, and click Create API Account.
- Choose Stencil CLI Token, then set a name and configure the access level.
- Click Save to download the token file.
-
Preview the theme on your local machine.
stencil init --url https://yourstore.com --token <token> --port 3000stencil start
Integrating a Dopple 3D Product in Stencil
Section titled “Integrating a Dopple 3D Product in Stencil”-
Modify the product page template
Edit the file
templates/components/products/product-view.html(or other product page template) to include the Dopple 3D product. -
Add a container element for Dopple
Include the following HTML in the desired spot on the product page template:
<div id="dopple-container"></div> -
Include scripts to load the product
Somewhere in your product page template (for example, in the
<head>section), include the following module script:<script type="module">document.addEventListener('DOMContentLoaded', async () => {// Ensure that the container element exists before loading the 3D productconst container = document.querySelector("#dopple-container");if (!container) return console.error('Container not found!');try {// Get Dopple fieldsconst customFields = JSON.parse(`{{{ json product.custom_fields }}}`.trim() || '[]');if (!customFields.length) return;// Get the product's owner, workspace, project name, and product versionconst doppleObj = Object.fromEntries(["dopple_owner","dopple_workspace","dopple_projectName","dopple_productVersion"].map(key => [key.replace("dopple_", ""),customFields.find(cust => cust.name === key)?.value ?? null]));if (Object.values(doppleObj).some(value => value === null)) {console.error("Missing Dopple fields");return;}// Be sure to set `position: relative` on the container and give it a height// (This is optional if your CSS already does this)Object.assign(container.style, { height: "300px", position: "relative" });// Load and initialize Doppleconst { DoppleXR } = await import("https://builds.dopple.io/packages/dopple-sdk@latest/dopple-sdk.js");const productOptions = JSON.parse(`{{{ json product.options }}}`.trim() || '[]');const defaultSelectedOptions = Object.fromEntries(productOptions.map(option => [option.display_name,option.values.find(val => val.selected)?.data || "Not selected"]));const dopple = new DoppleXR({container,selection: {},...doppleObj,});await dopple.load();await dopple.updateSelection(Object.keys(defaultSelectedOptions).length? defaultSelectedOptions: Object.fromEntries(Object.entries(dopple.matrix.choices).map(([key, value]) => [key, Object.keys(value.options)[0]])));dopple.run();const productForm = document.querySelector("form[data-cart-item-add]");if (!productForm) return console.error("Product form not found");// Update the 3D product's configuration when the product form changesproductForm.addEventListener("change", () => {const selectedOptions = Object.fromEntries(productOptions.map(option => {const input = productForm.querySelector(`[name="attribute[${option.id}]"]:checked`)|| productForm.querySelector(`select[name="attribute[${option.id}]"]`);return [option.display_name,option.values.find(val => val.id === +input?.value)?.data || "Not selected"];}));dopple.updateSelection(selectedOptions);});} catch (error) {console.error("Error initializing Dopple SDK:", error);}});</script>
Custom Fields Display (Optional)
Section titled “Custom Fields Display (Optional)”By default, custom fields are shown on the product page. To hide Dopple-related fields, update the template at templates/components/products/custom-fields.html.
Currently, Dopple configuration data is stored in the product’s Custom Fields. While there are other possible methods to store and retrieve this data, this example specifically uses Custom Fields for simplicity.
{{#each product.custom_fields}} {{#if name '!==' "dopple_owner"}} {{#if name '!==' "dopple_workspace"}} {{#if name '!==' "dopple_projectName"}} {{#if name '!==' "dopple_productVersion"}} <dt class="productView-info-name">{{name}}:</dt> <dd class="productView-info-value">{{{value}}}</dd> {{/if}} {{/if}} {{/if}} {{/if}}{{/each}}Testing and Deployment
Section titled “Testing and Deployment”Test locally by running the following command:
stencil startOnce you are ready, push to the BigCommerce Store using the following command:
stencil pushThis will deploy your theme updates to the live store.
Live Example
Section titled “Live Example”A live implementation of the above integration is available at xyz-i3.mybigcommerce.com/car-1.