Shopify Integration
Prerequisites
Section titled “Prerequisites”- Your Shopify store is using a compliant theme: a store with at least an Online Store 2.0 theme.
- You have a valid owner and workspace name ready for use.
- You know the configuration properties and values available on your 3D product (typically found in the editor from Dopple).
- You have at least one product created in your Shopify store.
Adding Owner and Workspace Metadata
Section titled “Adding Owner and Workspace Metadata”Adding Metaobject Definitions
Section titled “Adding Metaobject Definitions”-
Login to your Shopify admin account, and in the left-hand menu navigate to Settings > Custom Data > Metaobjects.
-
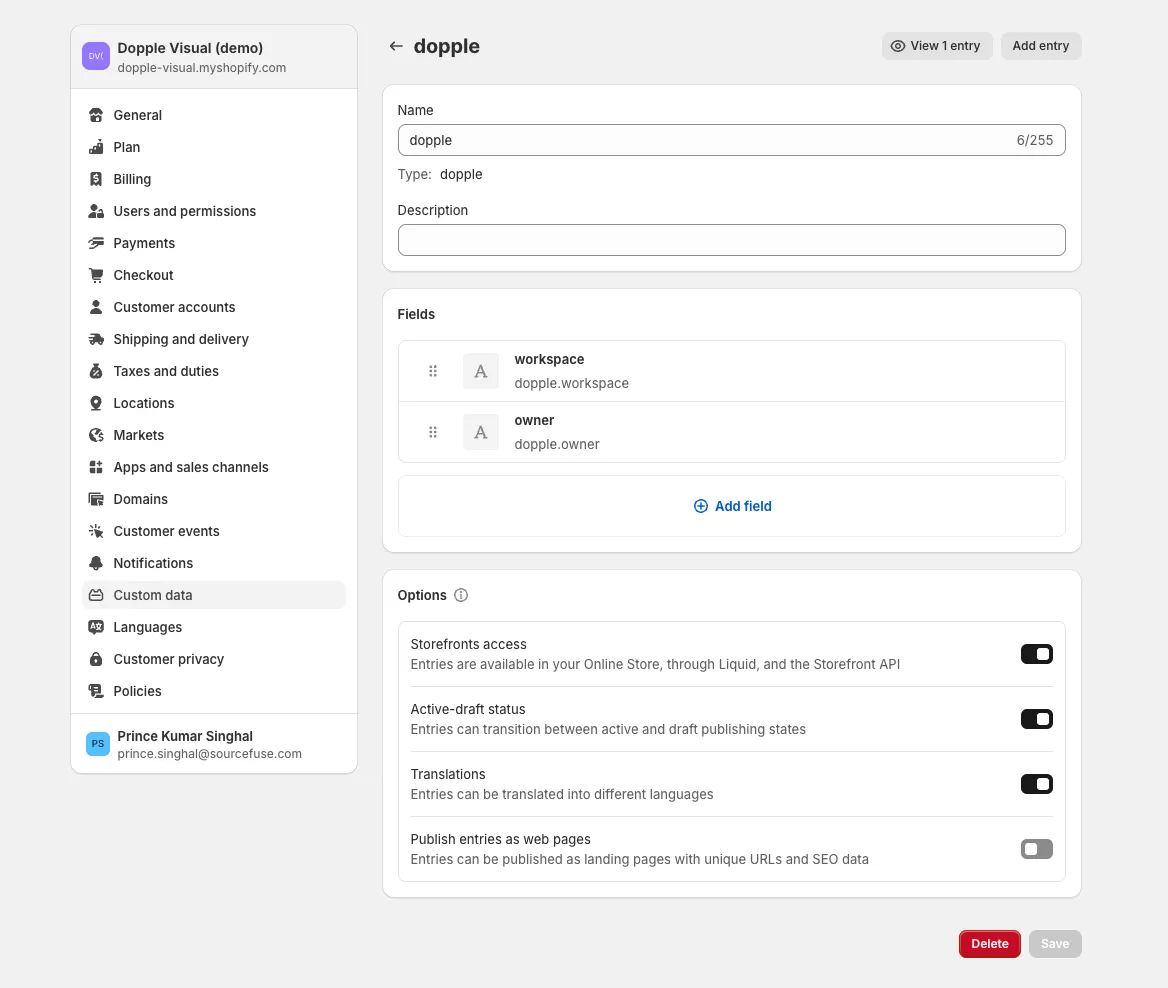
On the Metaobjects page, click the “Add Definition” button to create a new metaobject definition, and enter
dopplefor the name/type. -
Add two fields:
-
Field 1:
Workspace
Key:dopple.workspace
Type: Single line text (or another appropriate type)
Validation: Mark as Required -
Field 2:
Owner
Key:dopple.owner
Type: Single line text (or another appropriate type)
Validation: Mark as Required
-
-
Click “Save” to create the metaobject definition.
Adding a New Entry to the Metaobject
Section titled “Adding a New Entry to the Metaobject”-
Navigate to Custom Data > Metaobjects and select the metaobject definition (
dopple) you just created. -
Click the “Add Entry” button to create a new entry, and fill in the required fields:
- Workspace: Enter the workspace name provided by Dopple.
- Owner: Enter the owner’s name provided by Dopple.
-
Update the Handle name to
doppledatato identify the entry as a Dopple entry.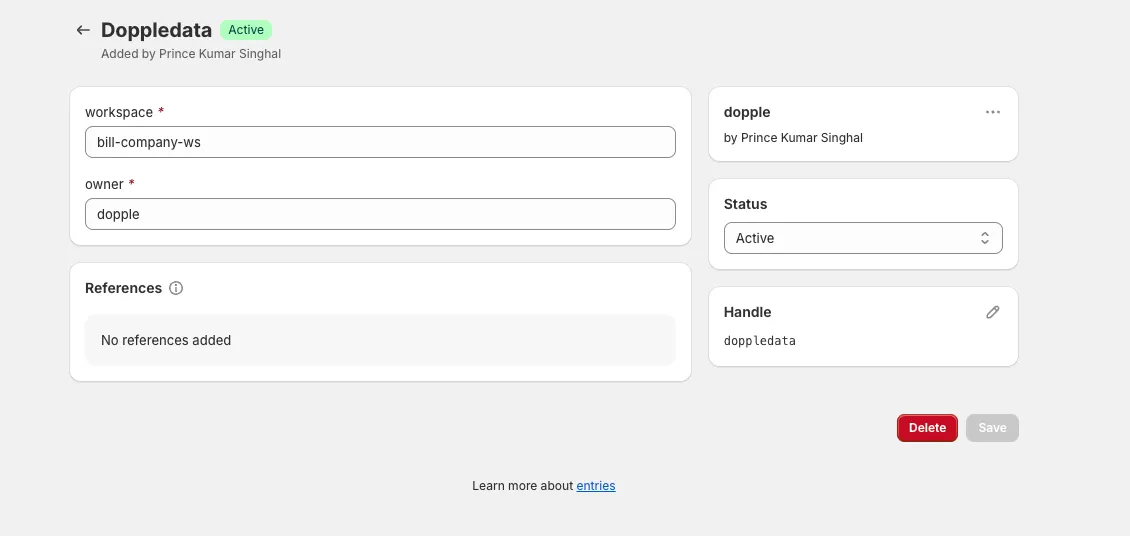
-
Click “Save” to finish creating the entry.
Creating Metadata Fields for Products and Variants
Section titled “Creating Metadata Fields for Products and Variants”Adding Product Name and Version Metadata
Section titled “Adding Product Name and Version Metadata”-
Access the metafield definitions page for your products by navigating to Settings > Custom Data > Products in your Shopify admin.
-
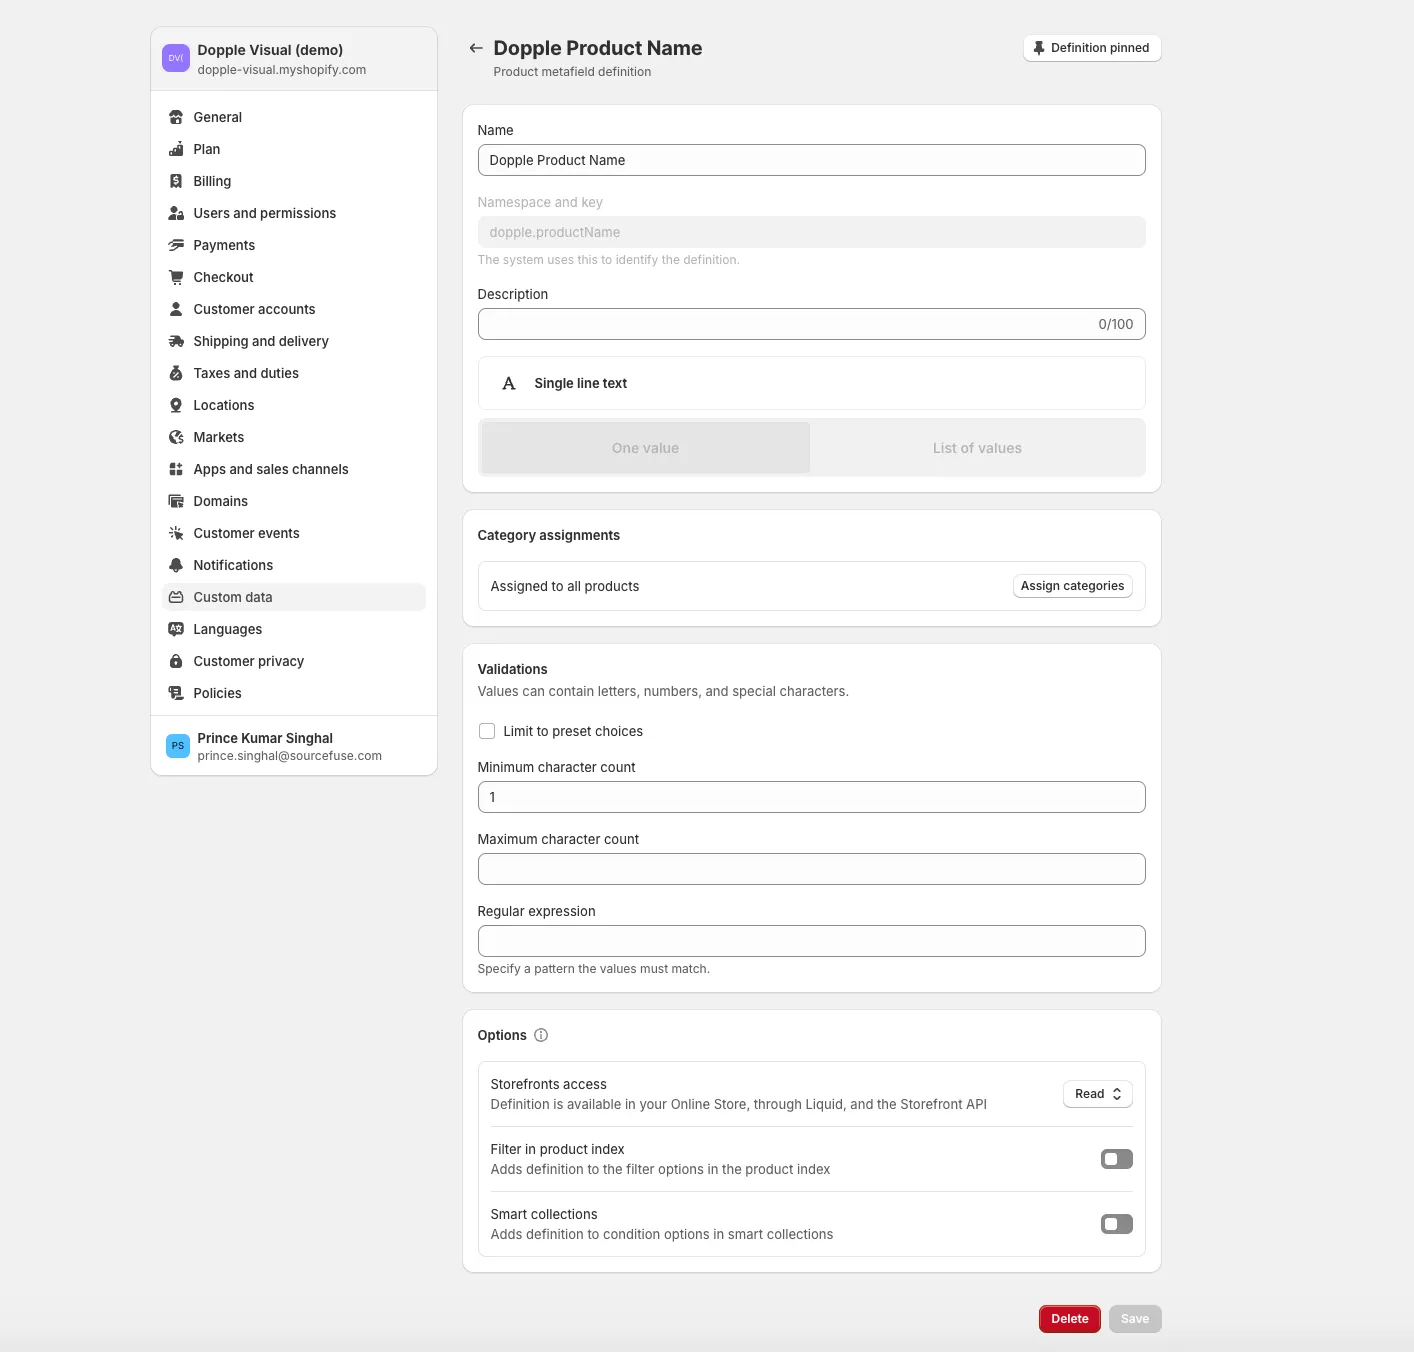
Create a new metafield for your Dopple product’s name by clicking the “Add Definition” button and entering the following fields.
- Name: Enter a descriptive name for this field, such as “Dopple Product Name”.
- Namespace and key: Enter
dopple.productName. - Content type: Select Single line text.
-
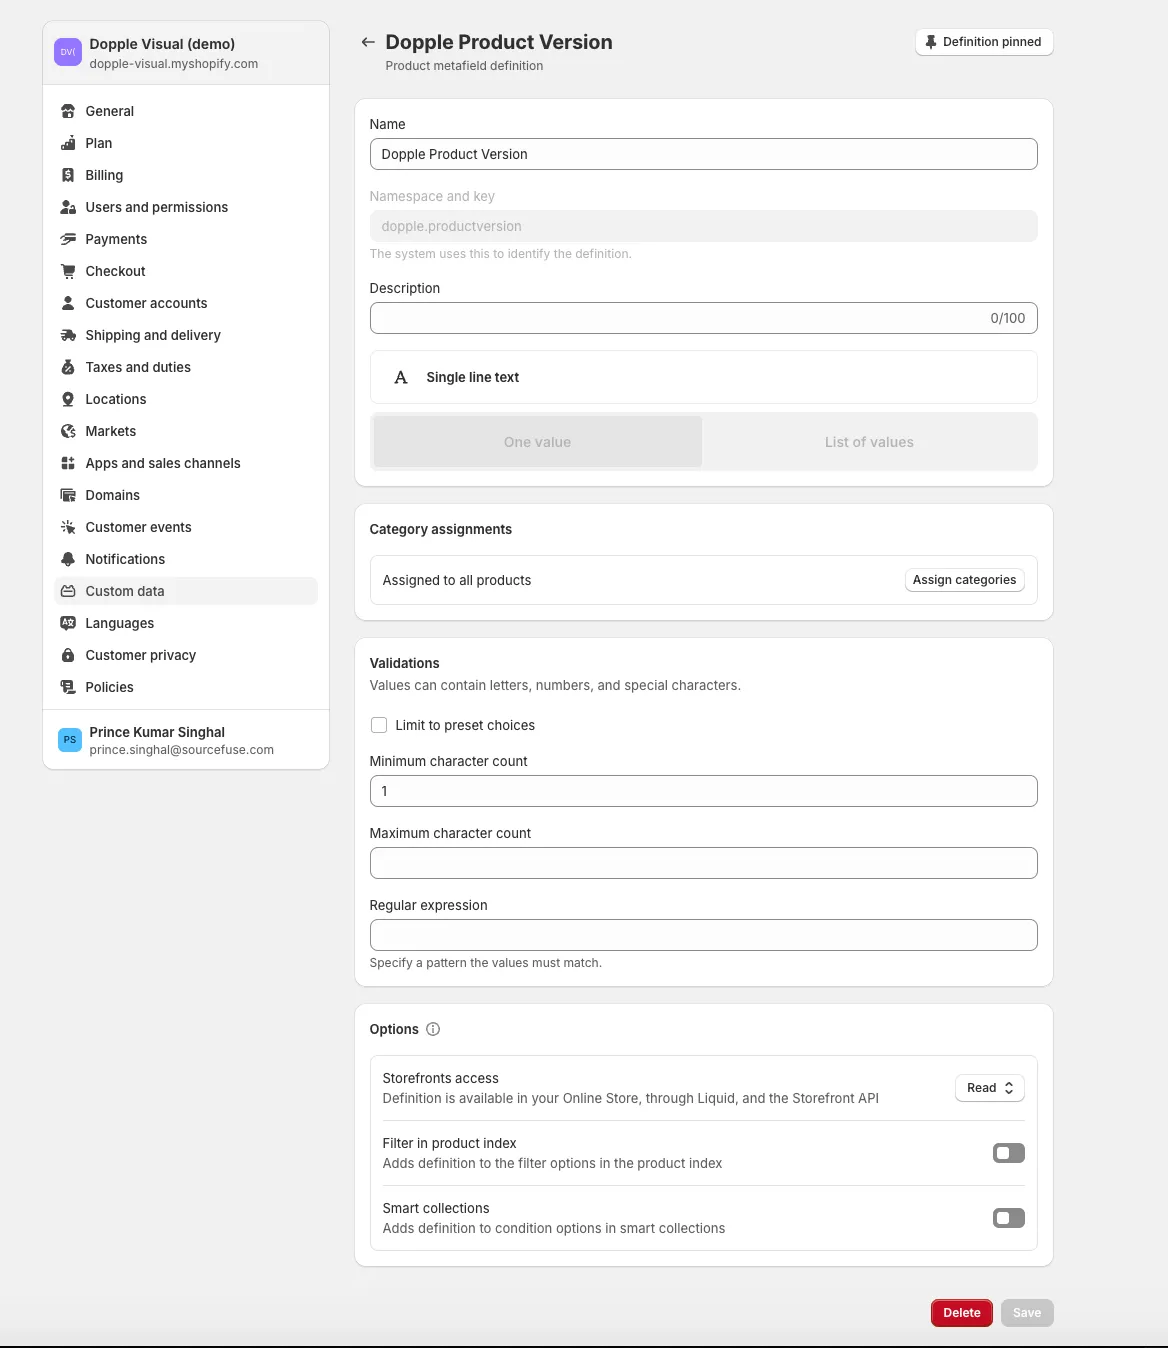
Create second new metafield for your Dopple product’s version with the following fields.
- Name: Enter a descriptive name, such as “Dopple Product Version”.
- Namespace and key: Enter
dopple.productversion. - Content type: Select Single line text.
-
Click “Save” to create the new metafields for your product.
Adding Metadata for Variants
Section titled “Adding Metadata for Variants”-
In the Custom Data section, select Variants. This will open the page where you can manage metafield definitions for products.
-
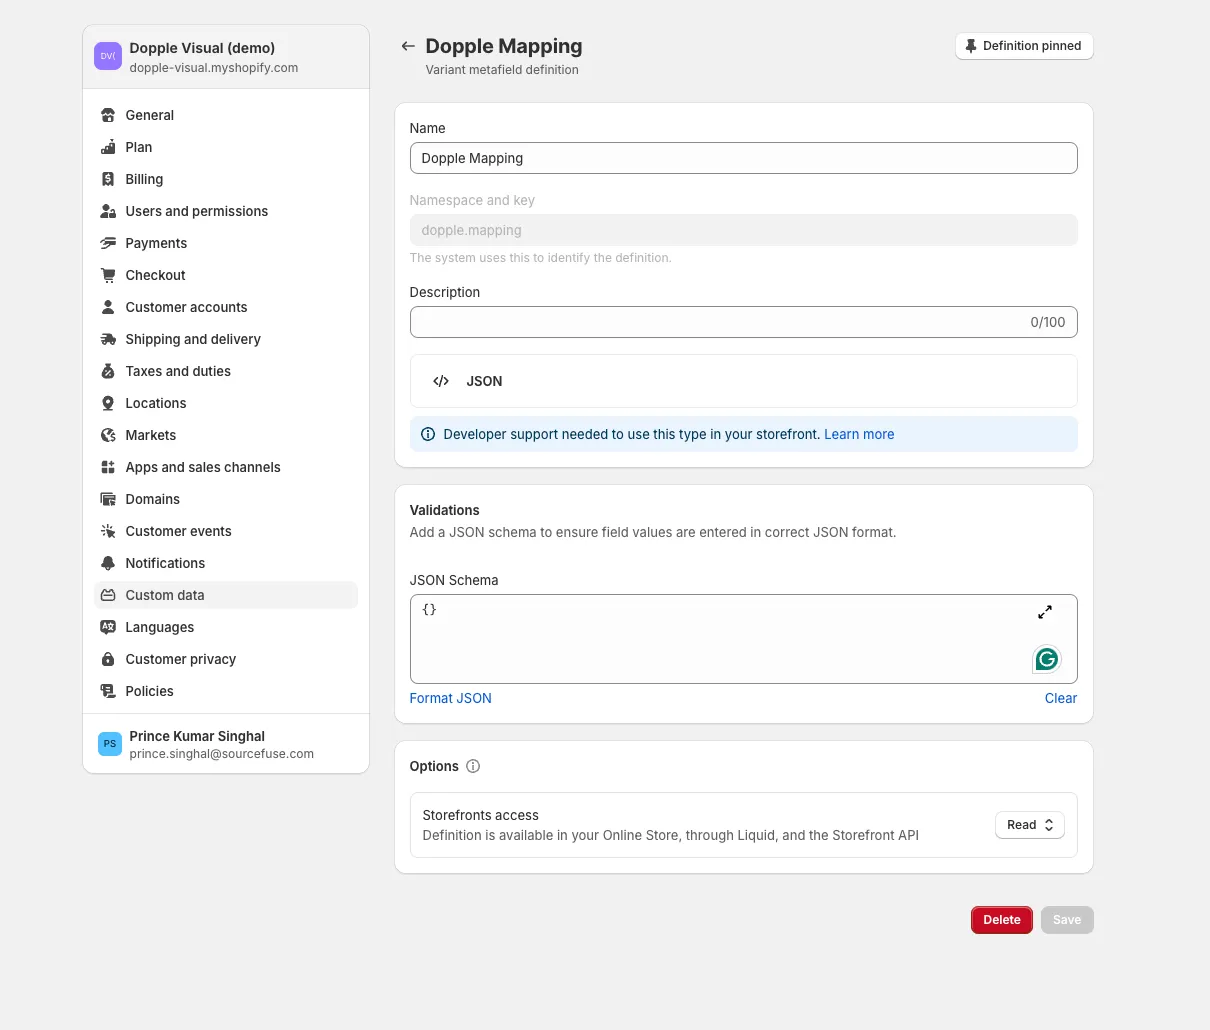
Click the Add definition button at the top-right corner to create a new metafield definition, and fill out the following fields:
- Name: Enter a descriptive name for the metafield. For example, “Dopple Mapping”.
- Namespace and key: Enter
dopple.mapping. - Content type: Select JSON.
-
Click “Save” to create the new metafield definition.
Steps to Configure Metadata and Variant Mapping for Products
Section titled “Steps to Configure Metadata and Variant Mapping for Products”To begin mapping your product metadata and variants to your 3D Dopple product, follow these steps:
-
Go to the Products section in Shopify and select the product to configure.
-
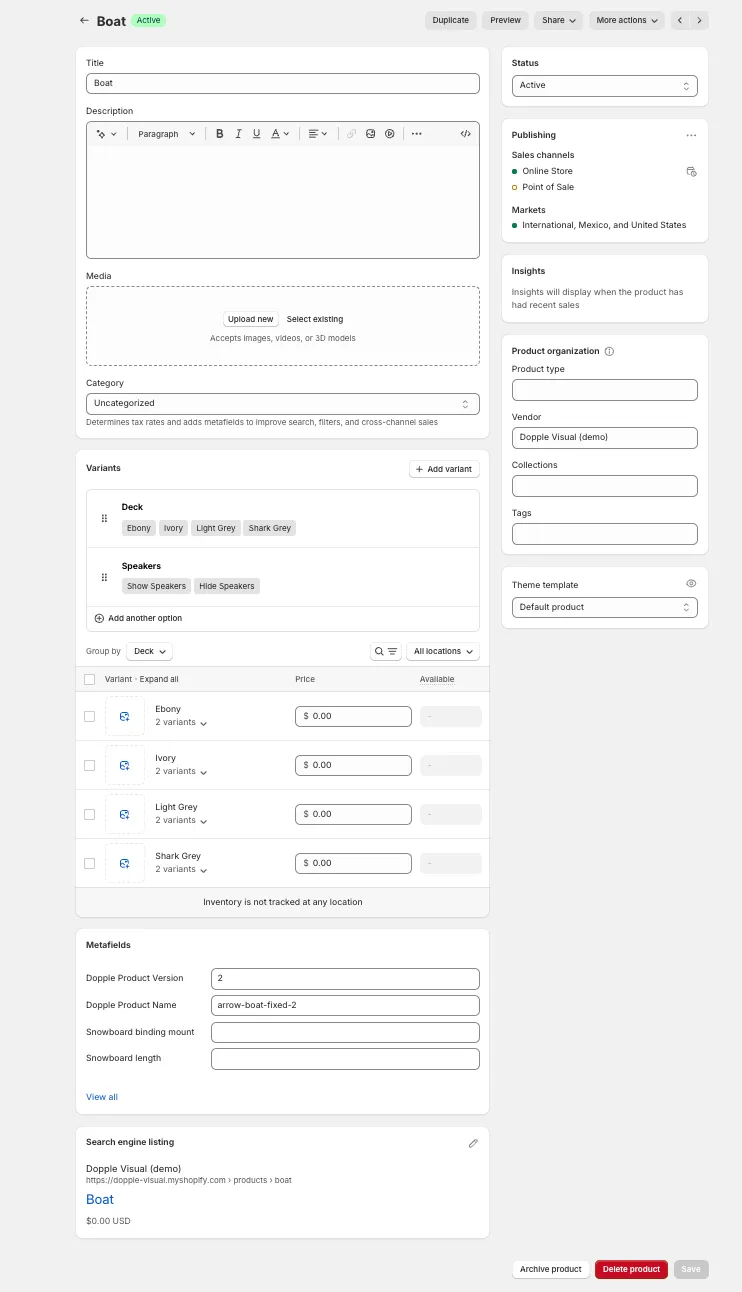
In the Metafields section, enter the following details provided by Dopple:
- Dopple Product Name: Enter the product name (example:
my-boat-product). - Dopple Product Version: Enter the product version.
- Dopple Product Name: Enter the product name (example:
-
Add or edit a variant in the Variants section of the product, and locate the Dopple Mapping field in the Metafields section for the variant. Then, enter the choice-option mapping in JSON format:
{"choice1": "opt1","choice2": "opt2"}For example, if the choices for a variant are
SizeandColor, and the options areLargeandRed, the mapping should be:{"Size": "Large","Color": "Red"}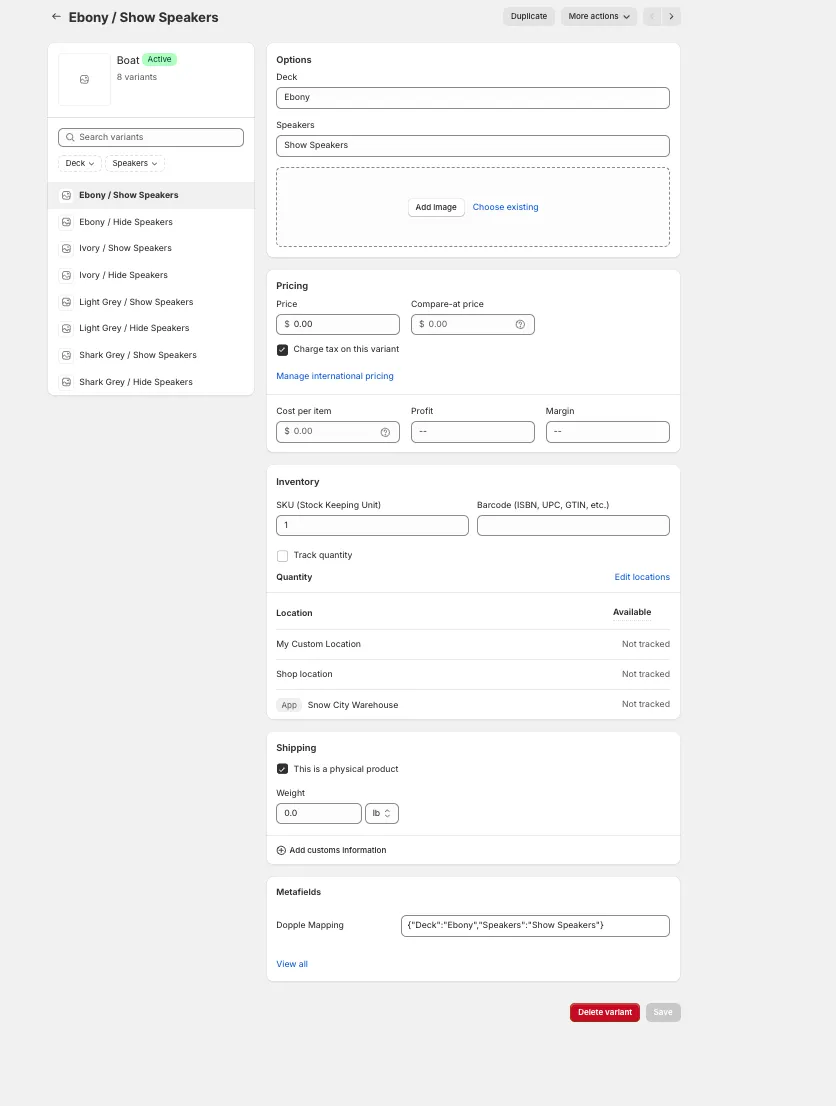
Adding Dopple to Your Site Pages
Section titled “Adding Dopple to Your Site Pages”From your Shopify store’s dashboard, navigate to Online Store > Themes > Customize to begin adding Dopple content blocks to pages on your site. In the Sections panel, click on Custom Liquid and add the following Liquid code to include the Dopple 3D object on your product page.
{% assign dopple_metaobject = shop.metaobjects.dopple.doppledata %}{% assign product_metafield = product.metafields.dopple %}
<div id="containerEle" style="height: 300px; position: relative;"></div><style>  #containerEle div {    display: block !important;  }</style><script>  document.addEventListener('DOMContentLoaded', async function () {    // Ensure the canvas exists before running the script    const container = document.getElementById('containerEle');    if (container) {      console.log('Container ready for rendering');    }
    const productVariants = [      {% for variant in product.variants %}        {          "mapping": {{ variant.metafields.dopple.mapping | parse_json }},          "variantId": "{{ variant.id | escape }}",        }        {% if forloop.last == false %},{% endif %}      {% endfor %}    ];
    const mappedVariant = productVariants.reduce((acc, variant) => {        acc[variant.variantId] = { ...variant };        return acc;    }, {});
    // Access and log product metafield    const doppleObj = {      owner: '{{ dopple_metaobject.owner | escape }}',      workspace: '{{ dopple_metaobject.workspace | escape }}',      productName: '{{ product_metafield.productName | escape }}',      productVersion: '{{ product_metafield.productversion | escape }}',      productVariants    };
    const productform = document.querySelector("product-form");
    console.log('Dopple Metaobject Fields:', doppleObj);
    const { DoppleXR } = await import(      "https://builds.dopple.io/packages/dopple-sdk@latest/dopple-sdk.js"    );
    const sessionId = window.crypto.randomUUID();
    const dopple = new DoppleXR({      container,      selection: {},      owner: doppleObj.owner,      workspace: doppleObj.workspace,      projectName: doppleObj.productName,      productVersion: doppleObj.productVersion,      logNamespace: "sdk",      sessionId    });
    await dopple.load();
    const selectedVariantId = productform.querySelector('input.product-variant-id')?.value;
    const selected = Object.entries(dopple.matrix.choices).reduce(      (acc, [key, value]) => {        if(mappedVariant[selectedVariantId].mapping.hasOwnProperty(key)) {          acc[key] = mappedVariant[selectedVariantId].mapping[key] || Object.keys(value.options)[0];        } else {          acc[key] = Object.keys(value.options)[0];        }        return acc;      },      {},    );
    await dopple.updateSelection(selected);
    dopple.run();
    const canvas = document.querySelector('canvas'); // Ensure you select the correct canvas
    productform.addEventListener("change", function (event) {      const currentVariantId = event.target.value; // Leather, Black, etc.      const { mapping: doppleMapping } = mappedVariant?.[currentVariantId];
      for(const choice in doppleMapping) {        selected[choice] = doppleMapping[choice];      }      dopple.updateSelection(selected);    });
  });</script>
For now, we are using Custom Liquid to add the 3D object to the page. In the future, we plan to create an extension to simplify this process.