WooCommerce Integration Guide
Dopple provides an official plugin for ecommerce sites built on WooCommerce. This plugin makes it easy to assign the properties and values for your 3D product to WooCommerce’s variable products’ attributes, so they can be triggered as needed by your page’s UI.
Installing the plugin
First, download the Dopple WooCommerce plugin (ZIP).
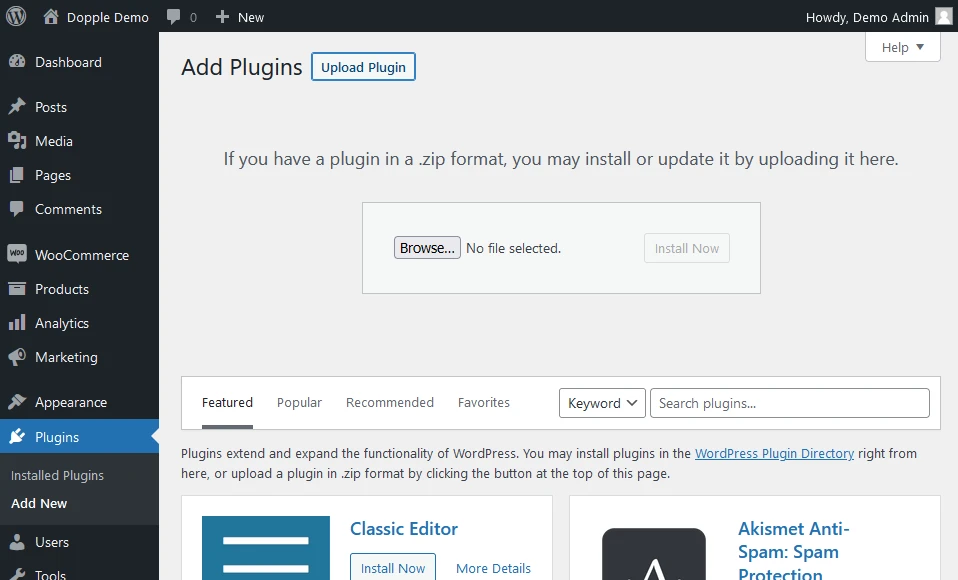
Then, in your WooCommerce admin dashboard, navigate to Plugins > Add New > Upload Plugin.
Configuring your Dopple client ID
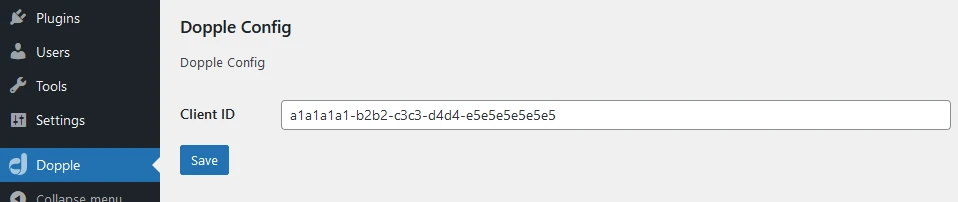
After installing the plugin, you will see a new item for Dopple appear in the lefthand menu. For now, this screen will only allow you to set your unique client ID assigned to you by Dopple, but other options and settings will be shown here in future updates.
Setting up your variable products
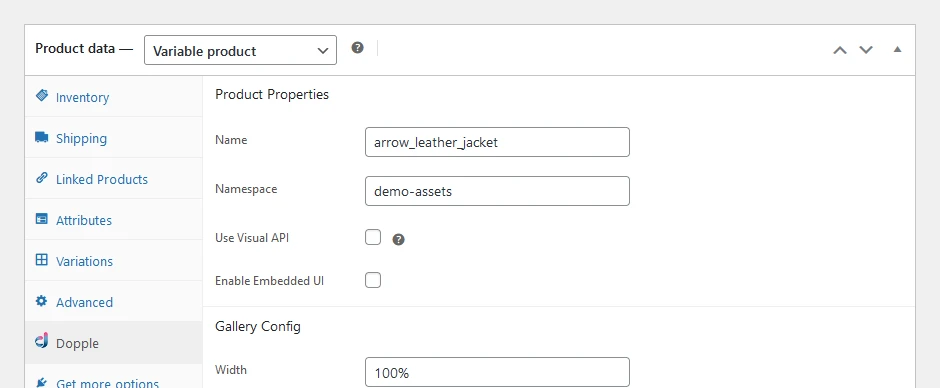
Once installed, the plugin will add a section for Dopple settings under your Variable Product settings.
info
Be sure to add all of the configurable options for your product in the Attributes tab first! The Dopple plugin will depend these when mapping out which properties and values on your 3D product correspond with each WooCommerce attribute.
Farther down the Dopple settings screen, you will see a list of all available WooCommerce attributes on your product and the options for each one. Here, you are be able to add the corresponding Dopple properties and values for each configuration option on your product.
In the example below, we have a Leather Jacket product with options for the jacket’s color, material, inside liner, and more.

tip
Unsure which Dopple properties and values are available on your 3D product? Dopple will put together a configurability matrix for you which which lays out everything. For example, the configurability matrix for the Leather Jacket example above may look like:
| Dopple Property | Dopple Value | Description |
|---|---|---|
| jacket_color | [255, 255, 255] | Sets the jacket's color to an RGB value |
| jacket_material | jacket_leather | Leather material |
| jacket_material | jacket_nubuck | Nubuck material |
| jacket_material | jacket_vintage | Vintage material |
| jacket_liner | liner_solid | Solid-colored inside liner |
| jacket_liner | liner_pattern | Patterned inside liner |
| jacket_patch_decal | patch_amazon | "Amazon" patch decal on the jacket's back |
| jacket_patch_decal | patch_heart | "Heart" patch decal on the jacket's back |
Using the properties and values on your page
After mapping the Dopple properties and values to each attribute and option on your WooCommerce product, a <script> tag will automatically be added to your product page containing a JSON-like object of all available configuration options, available globally as doppleAttributeMap.
<!-- WooCommerce's automatic output on your page -->
<select id="wc_select_color">
    <option value="brown">Brown</option>
    <option value="gray">Gray</option>
    <option value="tan">Tan</option>
    <!-- etc... -->
</select>
var doppleAttributeMap = [
    {
        "attribute": "wc_select_color",
        "valueMapping": [
            {
                "value": "brown",
                "doppleProperties": [
                    {
                        "propertyName": "jacket_color",
                        "propertyValue": "[89,66,51]"
                    }
                ]
            },
            {
                "value": "gray",
                "doppleProperties": [
                    {
                        "propertyName": "jacket_color",
                        "propertyValue": "[76,76,76]"
                    }
                ]
            },
            // etc...
        ]
    }
];
If using a default or supported WooCommerce setup, the Dopple plugin will automatically add event listeners to your page’s configuration options to update the 3D product when a user selects a new option.
For more complex WooCommerce stores using custom themes, you can add your own event listeners to the configuration options on your page to call setValue() manually.
<!-- The Dopple Visual Component -->
<atlatl-visual client-id="a1a1a1a1-b2b2-c3c3-d4d4-e5e5e5e5e5e5">
    <av-product namespace="my_namespace" name="my_product_name"></av-product>
</atlatl-visual>

<!-- WooCommerce's automatic output on your page -->
<select id="my-custom-color-select">
    <option value="black">Black</option>
    <!-- etc... -->
</select>
// The doppleAttributeMap will be available globally on your page and generated automatically by the Dopple plugin
var doppleAttributeMap = [
    {
        "attribute": "my_customer_color_attribute",
        "valueMapping": [
            {
                "value": "brown",
                "doppleProperties": [
                    {
                        "propertyName": "jacket_color",
                        "propertyValue": "[89,66,51]"
                    }
                ]
            },
            // etc...
        ]
    }
];

// Get the custom <select> element for the product's color options
const myCustomSelect = document.getElementById('my-custom-color-select')

// Get the instance of the 3D dopple product
const doppleProduct = document.querySelector('av-product').product

// Listen for when a user selects a new color option
myCustomSelect.addEventListener('change', (e) => {

    // Get the selected value, e.g. 'brown'
    const selectedValue = e.target.value

    // Find the corresponding Dopple properties and values for that selected value
    const attributeObj = doppleAttributeMap.find((item) => item.attribute === 'my_customer_color_attribute')
    const value = attributeObj.valueMapping.find((item) => item.value === selectedValue)

    // Call setValue() on the 3D Dopple product with the corresponding Dopple properties/values
    value.doppleProperties.forEach((val) => {
        doppleProduct.setValue(val.propertyName, val.propertyValue)
    })
})
Shortcodes
The [dopple-product] shortcode may be used for quickly adding a 3D product to a page or post on your site, and requires only the name and namespace attributes:
[dopple-product name="my_product" namespace="my_namespace"]
This will output the following HTML on your page:
<atlatl-visual client-id="a1a1a1a1-b2b2-c3c3-d4d4-e5e5e5e5e5e5">
    <av-product namespace="my_namespace" name="my_product" id="dopple-product"></av-product>
</atlatl-visual>
Note
The shortcode will use the Client ID set in the Dopple Config settings.